Showing posts with label Minion Cards. Show all posts

June 26, 2021

We Go Together Minion Card

Hello, snarky card-loving friends!
Tracy here, and I'm back with my next Snarky Minion card. Seriously, they can get away with saying anything. Here are the details. 


Other Products Used:
Distress Oxide Ink- Wilted Violet, Lucky Clover
Archival Ink- Jet Black
Zig Clean Color Markers
Waterbrush
Blending Tool and Mat
Water Mister
Glossy Accents
Cardstock- White
MISTI
Stamptabulous Stamping Tool
Scrapbook Adhesives by 3L- E-Z Runner Grand, Crafty Foam Tape, 3D Foam Squares

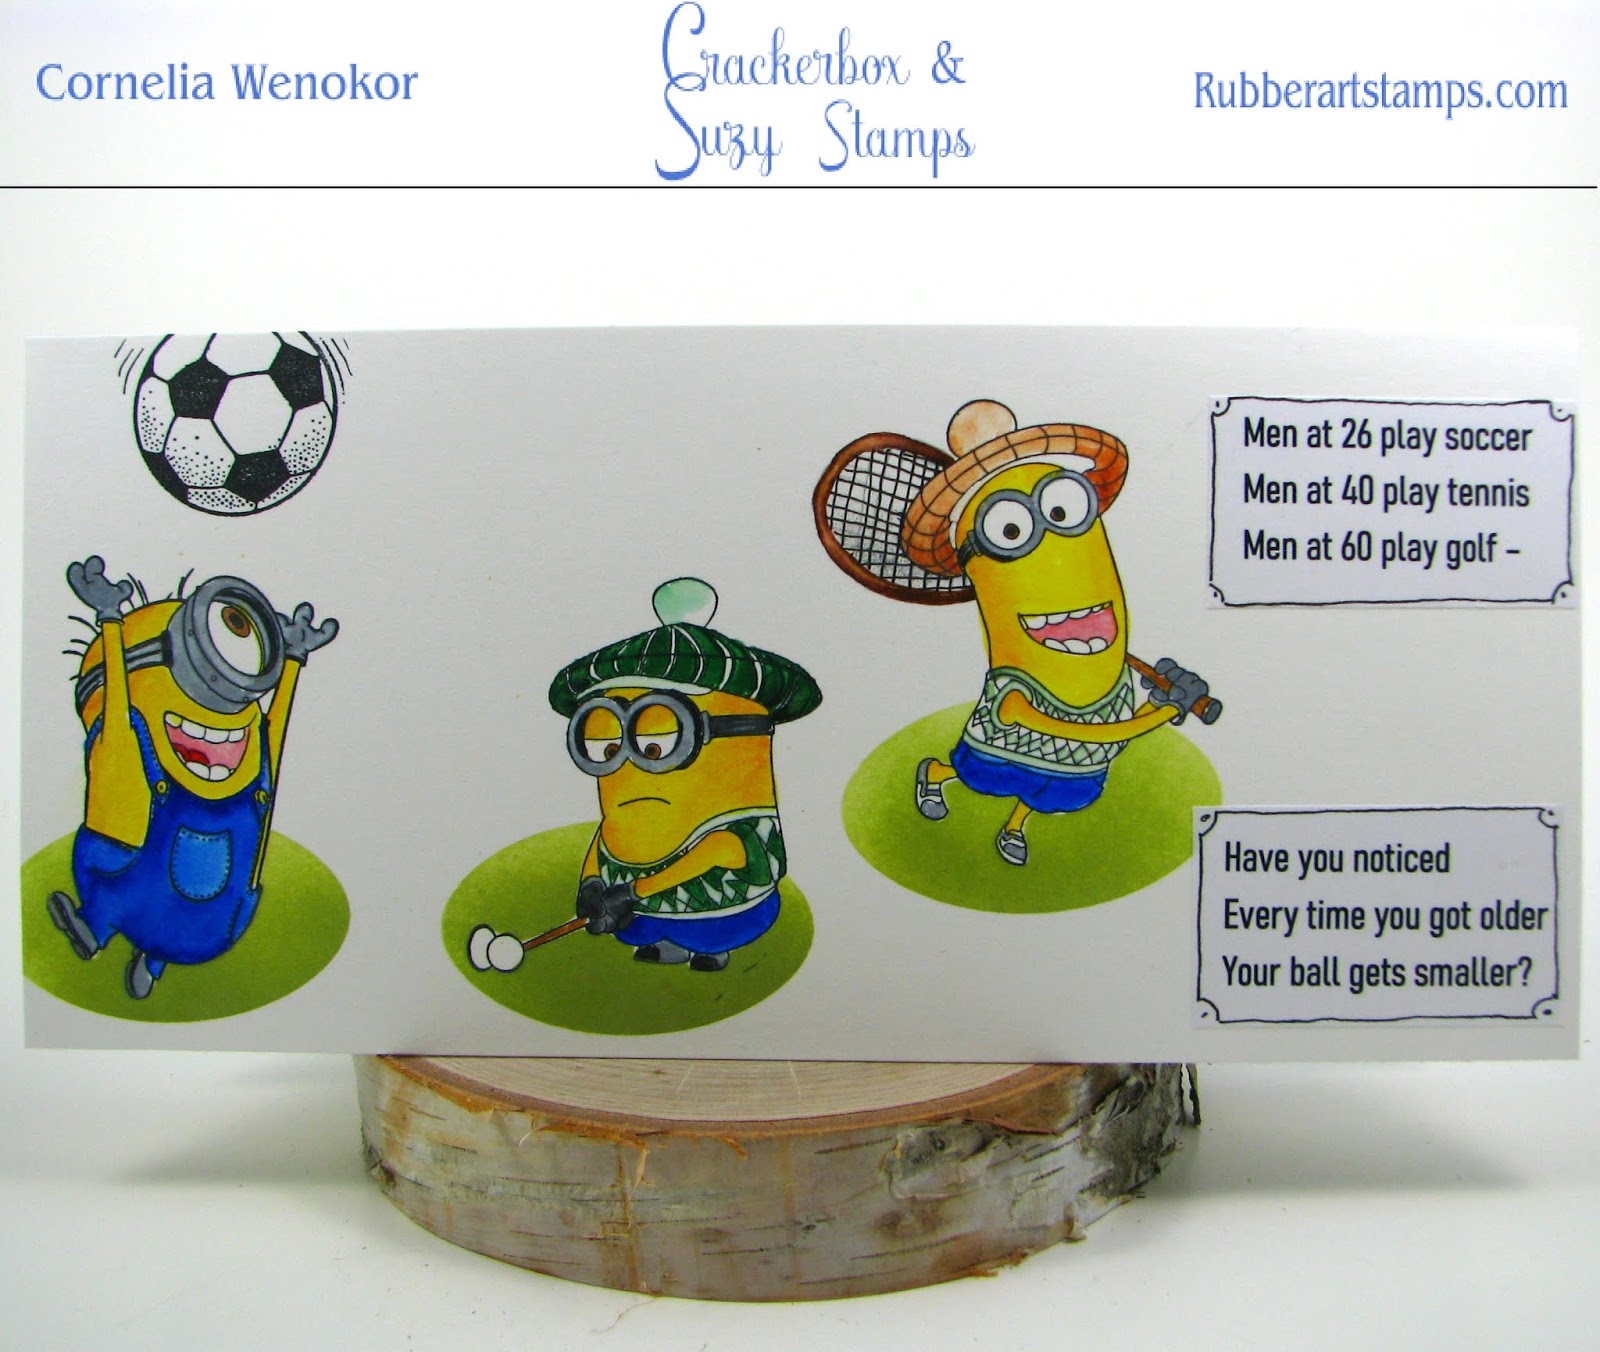
The card base is white cardstock. Cut the card front to 3.75x5, and a mat also from white cardstock that is 4x5.25. Take the card front and blend a simple background using the green ink, then come back add a little bit of the purple ink around the edges. Mist the card front with water and let the ink react. Then using the Coffee Stain stamp, mist it with water and then stamp it onto the background to create that perfect looking drink stain.
Using my trusty MISTI and Stamptabulous stamping tool, add the sentiment to the middle of the card using black ink.

Stamp the Minions onto white cardstock and add color to them using Zig Clean Color Markers and a water brush. once completely dry, I fussy cut out the images then added Glossy Accents to the glass of the goggles. Let dry completely. Add them to the sides of the cards using foam squares.

Thanks so much for stopping by!

January 29, 2021

You Rock Minion Stamped Card

Happy Saturday! Maria Pilar here sharing a fun card with Minion Bob and Minion Phil stamps from Crackerbox & Suzy Stamps


I really love the Minion stamps and these two friends and I found these two friends ideal to appear together on my card. After stamping Minion Bob and Minion Phil along with the saying You rock on white cardboard, I colored them in with Copic markers. Then I stamped the Corner 1 Stamp in the corners with Distress Oxide Fossilized Amber to frame the card like a painting. As my Minions are dressed in jeans, I glued some enamel dots in blue to complete the decoration of my card. And when all this was ready, I glued it on a yellow base card.


What do you think of the combination of yellow with blue?

You can find these stamps and more at Crackerbox & Suzy Stamps store by clicking HERE
Thanks for stopping by and happy weekend!

January 6, 2021

A Minion Bananas Slimline Birthday Card

Hello, Nadine here today with a fun minion bananas slimline birthday card. 

I first stamped the Minion Carl Being Happy Stamp toward the bottom of my card and then stamped the Unless You're A Banana Sentiment towards the top of my card. Then stamped the Banana Single Stamp three times to make it look like Carl was throwing them up in the air.

I then colored in Carl and the Bananas with Copic Markers. After I got it all colored in I decided that the background was too plain. So using my airbrush and a stencil, I added some design by airbrushing with a light yellow Copic Marker. 


Interested in the products I used? Products that are still available are linked to multiple shops below, for your convenience.
Lists may contain affiliate links where possible at no cost to you, what so ever. Affiliate and product disclosure can be found here.
I design for several companies because I genuinely love their products! Anything I recommend on my blog is something that I genuinely love and regularly use. I buy most of my own supplies. However, I do receive some free products to work with, and I sometimes make money for the projects I make. I DO NOT get paid for product reviews, I give my honest opinion about the products I use, and I will never recommend a product that I do not like or would not use.

December 29, 2020

Out with 2020 New Years Minion Card

 Hi Everybody,

Cornelia here today. Some of the products I have used have been provided to me by various companies I design for. Affiliate links may be used in the links provided below.

Crackerbox & Suzy Stamps has a lot of Minion stamps and they are perfect for all year round to use - even for the New Year!!


The stamps I used:

I colored the Minion stamp with markers and water brush pens. Added the 2020 and the dot splatters. Heat embossed the pointy stars in gold. Added Washi tape at the bottom and a bit of Stickles to the dots.


I hope you liked this. Thanks for visiting!
Happy New Year - I hope it has better things in store for us than 2020!

December 13, 2020

'Tis the Season Minion Christmas Card

 Hi Everybody,

Cornelia here today. Some of the products I have used have been provided to me by various companies I design for. Affiliate links may be used in the links provided below.

Crackerbox & Suzy Stamps has a lot of Minion stamps and they are perfect for all year round to use - even for Christmas!


The stamps I used:

I colored the stamps with markers and Inktense pencils. Added the antlers (Craft Emotions). I stamped the lights on a scrap piece of cardstock, colored them and fuzzy cut them.  Used an enamel dot as the nose. Added some splatters and heat embossed the sentiment on black.


I hope you liked this. Thanks for visiting!
Happy Stamping!

October 2, 2020

Scarecrow Stamped Tag

Hi friends, Martha Lucia here to share a Fall Stamped Tag created with Crackerbox & Suzy Stamps. I love this season, the colors are great and inspire us to create. 


I used Happy Fall Echo Park Double Sided Paper and Vellum card stock. I cut two different layers with the Nested Labels Dies. And tie them together with a green ribbon and bakers twine.


To finalize, I stamped with VersaFine Onix the Scarecrow image and colored it with Illustrator Markers: CR10, OR2, EB1, CG2, CG3, CT1, CT2, CT4, CR2, MB1, TB3, TB4, AG1. Then, I fussy cut the image and pasted over the vellum layer using E-Z Runner Permanent Vellum Adhesive. For the Thanks word, I just edit the Thanks a minion sentiment and stamped it with White Craft Ink.


This month the special promotion of Crackerbox & Suzy Stamps includes the Fall, Thanksgiving, and Leaves & Treets at 20%OFF.

Thank you for stopping by!

Martha Lucia

September 22, 2020

Quick & Easy Halloween Cards
by Nadine Carlier

Hello! Nadine here today with two quick and easy Halloween cards.


 I created the background with a stencil and a Gel Press and white acrylic paint. For the Crabby Cat and Black Cats Prowl stamps, I stamped them in VersaMark and then heat embossed them with black embossing powder.

Because of the shine from the embossing powder, the Black Cats Prowl sentiment is hard to read in the photos but it says, "When black cats prowl and pumpkins gleam may luck be yours on Halloween!"

For the Minion Count Phil card. I colored the Minion with Copic Markers and fussy cut him out. Then heat embossed the Frightfully Spooky sentiment with yellow embossing powder.


Don't forget to visit the STORE and check out all of the Halloween & Birthday stamps that are 20% OFF this month.
Just add them into your cart and you will then see the discount on the stamps once they are in your cart.


Thank you for stopping by and happy crafting!
Nadine

Interested in the products I used? Products that are still available are linked to multiple shops below, for your convenience.
Lists may contain affiliate links where possible at no cost to you, what so ever. Affiliate and product disclosure can be found here.
I design for several companies because I genuinely love their products! Anything I recommend on my blog is something that I genuinely love and regularly use. I buy most of my own supplies. However, I do receive some free products to work with, and I sometimes make money for the projects I make. I DO NOT get paid for product reviews, I give my honest opinion about the products I use, and I will never recommend a product that I do not like or would not use.

September 21, 2020

Happy Birthday Minion Stuart by Donna Idlet

 Hello everyone!

It's Donna and I have a birthday card to share today using Minion Stuart Playing and the sentiment is Happy Birthday script small.  This month the Birthday and Halloween stamps are 20% off, you still have a few more days to shop.

Here is my card for your inspiration:


Here is how I created my card:

I used design series paper to create the background of my card.  I then stamped the inks to create the background masking off the moon. I then stamped the image Minion Stuart Playing and colored it with copics.  I added some glossy accent to the eye to give it some dimension.  I then stamped the sentiment Happy Birthday script small.

Closer look at the card.


I hope I have inspired you. If you did not know, Crackerbox and Suzy Flaunt it if You Made it Facebook group there is a monthly card making "theme" and September's theme is Halloween and Birthday.

The monthly special is:


Thank you for stopping by, please come back again soon!

September 11, 2020

Quick Halloween Cards

 Hi Stampers,

Vicky here today. I have 3 very quick Halloween cards today. I make a lot of Halloween cards for the kids and friends so I need a lot of them like Christmas so having quick ones is helpful. I hope you can get some inspiration from one or all of these. Plus ALL of the Halloween stamps are 20% OFF!

My first one is the one that took the longest, maybe 20 minutes. I used 3 brushes and a 1 inch circle I punched. I used the negative and positive of the circle.


Here is my 5 minute card. stamped, colored and made slash marks around the saying.


This one was the quickest one. Just a little coloring in the hat and brushed color around the edges.
 I hope you enjoyed the cards. 
Here are our sale!
Take care and stay safe and happy, 
Vicky

August 26, 2020

Growing Old Minion Card

Hello crafty friends! Tracy here, and today I have a snarky little birthday card to share. I love that you can use absolutely any snarky sentiment with a minion and it just works!
Here are all of the details.

Crackerbox & Suzy Stamps Used:

Minion Stuart with Cupcake                   Growing Old

Other Products Used:

Distress Oxide Ink- Picked Raspberry
Blending Tool
Embossing Pad
Black Embossing Powder
Staz On Ink- Jet Black
Chameleon Pens
Specialty Paper
Cardstock- White
Scrapbook Adhesives by 3L- Crafty Foam Tape, E-Z Runner Ultra, 3D Foam Squares, Dual Tip Glue Pen

I created a simple blended background using Distress Oxide Ink and a blending tool on white cardstock. Stamp the Growing Old sentiment using an embossing pad and black embossing powder.

Stamp the minion image onto white cardstock using Staz On ink. Add colour to the image using Chameleon Pens. Mat the blended card front in specialty paper and adhere to a white cardstock card base.


Fussy cut out the minion image and adhere to the card front using foam squares. Add liquid adhesive to the minion's goggle and let dry.

 
Thanks so much for stopping by!
Tracy

August 20, 2020

Creating a Handmade Card with Fun and Easy Masking

 Hi everyone! It's Lindsay here with you today, and I have a new card to share with you all. If you didn't know, one of my favorite cardmaking techniques is masking. It is one of those neverending versatile techniques that you can manipulate so many different fun ways. Today, I'm using masking in a very easy way to create a very fun background.

This card looks pretty similar and uses the same background stamps I used on my card today. The difference is instead of masking around the bananas and coloring in with ink blending. I masked the bananas with circles and ink blended around the stamped areas. Then, I colored each banana stamp with alcohol markers! But I absolutely adore this minion card! 


But onto today's card. Like I said, I used the "Banana Bunch" and "Banana Single" stamps to create a quick stamped background. Then I die cut several circles from masking paper and covered each stamped image. I also added more circle masks and overlapped them to create some clusters, too.

Then, I ink blended over the top. And finally, I pulled off the masks and colored in each image with alcohol markers to create this super quick background!


To finish the front of the card, I stamped the "Birthday 1" sentiment onto a strip of white cardstock, matted it with kraft cardstock, and attached the strip to the background. This sentiment is one of my favorites and I've used it many times!


As much as I love the outside of this card, you may be wondering why in the world you need banana stamps. Well, that's because there is this awesome sentiment from Crackerbox and Suzy Stamps called "Unless You're a Banana". It is the PERFECT funny and playful sentiment for anyone's birthday!

I stamped it on the inside of the card base and added a very light yellow stamped "Banana Bunch" behind it to finish this fun and simple masked card!


I hope you all enjoyed a look at this fun and easy handmade card and, the older card I made using these stamps, too! If you are interested in any of the stamps I used on my card today, you can find them all listed and linked down below! Until next time, happy crafting.


Affiliate links are used
Banana Bunch
Banana Bunch
Shop at:
CSS
Banana Single
Banana Single
Shop at:
CSS
Birthday 1
Birthday 1
Shop at:
CSS

July 13, 2020

Fun with Minions

Hi Everybody! 
Cornelia here today. I had some fun with those minions from Crackerbox & Suzy Stamps.


I used this month technique - masking for my card. I stamped the  3 minions - Carl being HappyBob golfing and Kevin golfing. I colored them with water brush pens and markers. I did turn Kevin's gold club into a tennis racket. I masked all three of them and sponged the green oval so they have something to stand on. Added the sentiment, which I printed on my computer. I doodled around the sentiment.


June 19, 2020

To A Great Dad

HI Stamper!
How is your summer going? I hope you are having a great summer, even with all of the restrictions.
Our Father's Day will be different then it has been in the past, but we will make the best of it.

 Here is the card I made for Father's Day for a dad who likes the Minions.
Great Dad

This card did not end up the way I had expected it to look. 
Have you ever had that happen?
I dropped an ink pad on the bottom of the card AFTER all of the coloring was done. GRRR
So, what to do...cut it off!
So I wasn't sure what to do. I decided to use the bottom of the card for a flap.

I added the saying, folded over the bottom of the card stock to the bottom of the saying and cut off the excess of card stock.

Then I stenciled the bricks.

Thanks for stopping by,
Stay healthy and happy
Vicky Briggs