
Hello and welcome! This is Shanna today with another fun project featuring stamps from Crackerbox Stamps!
Today’s project is a quick and easy one featuring the following products:

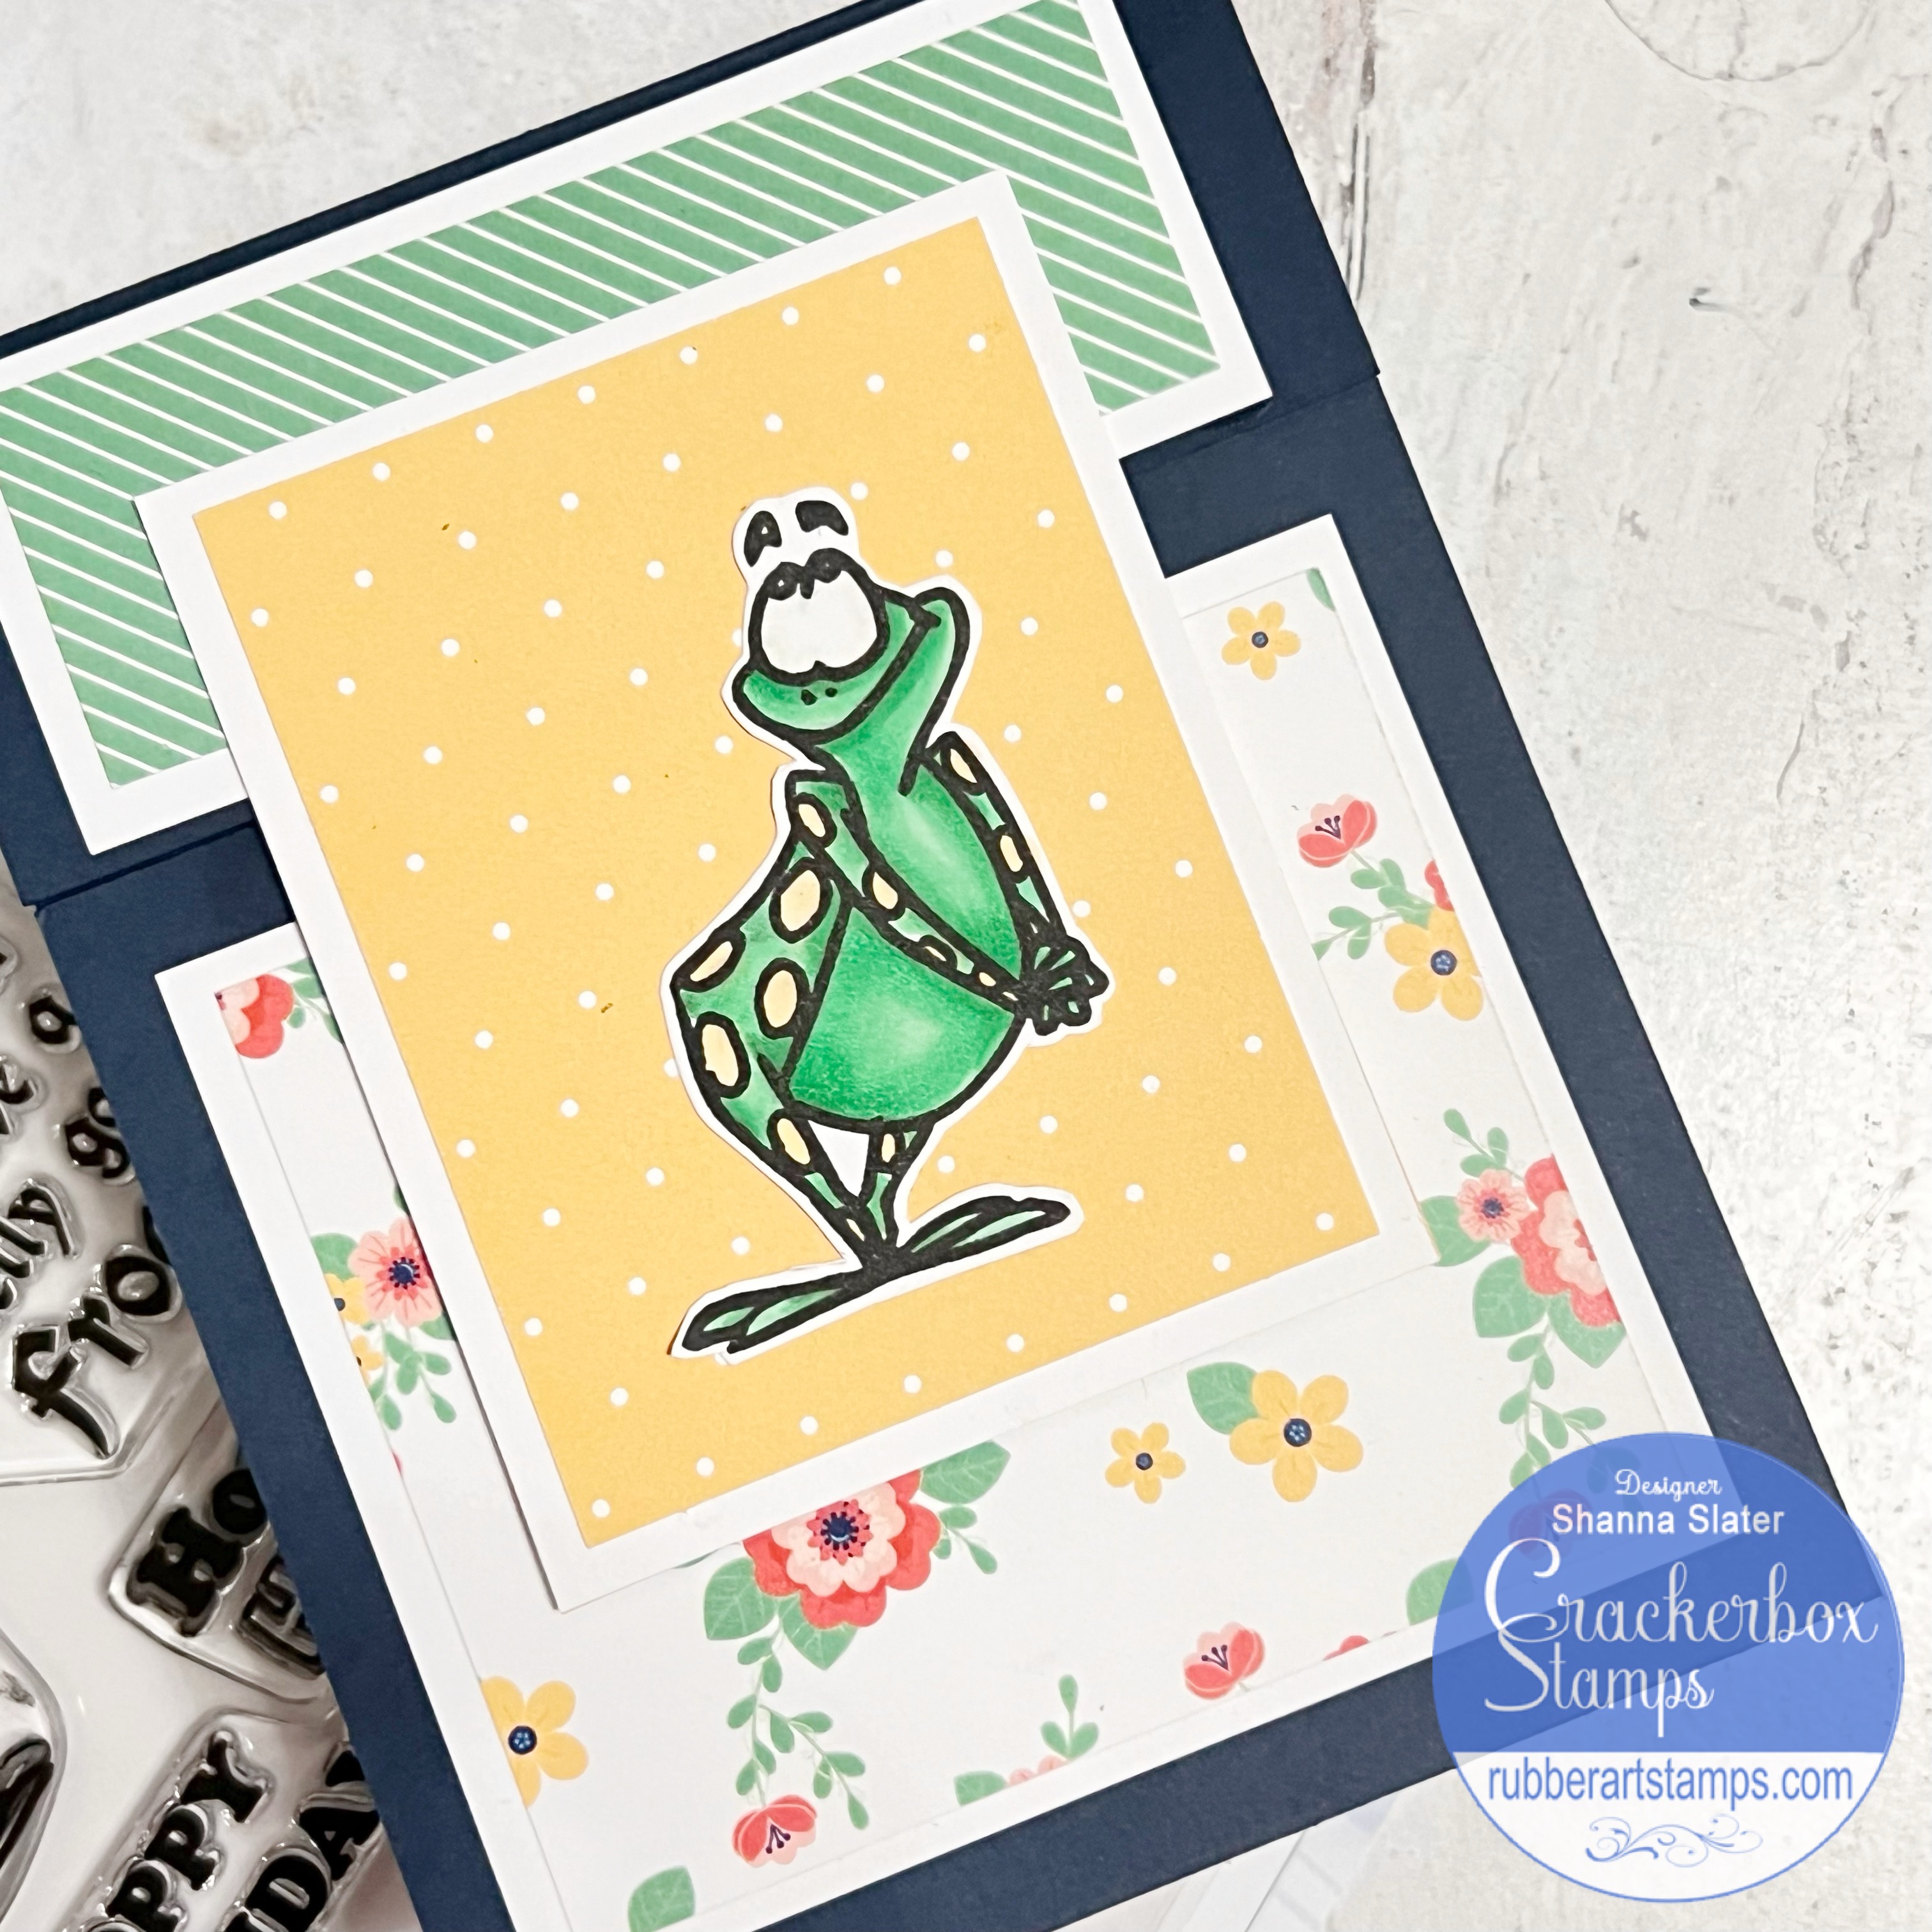
The card was created using a “spare” background from my pile of gel press prints I tend to have in a drawer lol. When I use my gel plates I make a lot of prints—but don’t use them all. So I cut them down to A2 size and they are my go to when I am stuck on what type of background I want for a card. I loved how the inky blue worked with the Minion in this case. The colored him with my Copic markers and the fussy cut him out. The sentiment was stamped directly onto the background.
Thanks for stopping by! See you all again soon
-Shanna


