November 3, 2025
August 20, 2025
Aye Matey Pirate Card
June 18, 2025
Snarky Day Drinker Pirate Card
I stamped and colored up J. Sparrow using Copics. I had originally planned to just use the Makes You a Pirate sentiment, but it seemed lonely on the card front. I love clean and simple, but sometimes a card calls for a bit more decoration, you know?
So, I searched my stash and found a gold-flecked parchment-like paper that went well with the Treasure Map stamp, which balanced out the image nicely.
Thanks for stopping by. I hope you have a great rest of your day! For a full list of products used and to see my other projects, just visit my blog, Frankie Helps Craft.
February 23, 2025
Pirate Jack Sparrow Sailors Delight Card
May 12, 2024
Play Like A Pirate
February 17, 2024
Pirate Card - Any Occasion
Hi everyone, today I am sharing this Pirate card that can be used for Birthdays, Snarky, or Any Occasion.
February 15, 2022
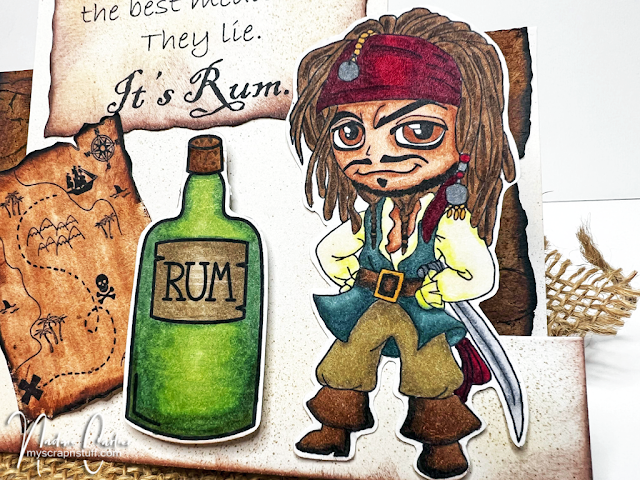
Pirate Rum Card
Hello, Nadine here today with a fun Pirate rum card that is perfect to set on a desk or counter to give someone a smile every time they look at it.
I used one of the Horizontal Center Step Cards for the base for my card. There are 10 cards including envelopes in a pack and they are 30% OFF right now in the store.
For the stamps, I used the J. Sparrow Stamp and colored him in with Copic markers and then fussy cut him out.
I also used the Pirate's Best Medicine Sentiment Stamp and cut the stamp out creating wavy like edges and then inked the edges up and used my airbrush machine to spray some of my Copic markers onto the card base and sentiment. I also stamped colored and fussy cut out the Pirate's Rum Bottle and Treasure Map. Then adhered all the images to the front of the Horizontal Center Step Card.
December 25, 2021
Happy New Yarrrh Pirate Card
Merry Christmas! It's Marcia here today sharing a fun New Years card with a twist. Who needs a glittery ball drop when you can drink rum and talk like a pirate? (LOL)

Supplies used:
Pirate
Makes You A Pirate
To make the Pirate silhouette stand out more against the map background paper, I stamped on white paper and then cut out. I typed the sentiment on my computer (but shared the idea with sweet Vicky as a custom stamp idea). I inked the edges of the word bubble and the map paper with Vintage Photo Distress Oxide ink and used scraps of paper for the inside. I hope you all have a happy holiday and amazing new YARRRRRH! xx
July 26, 2021
It Be Yer Birthday Pirate Card!
Hello crafty friends! Tracy here and today I have a fun little card to share for your pirate-loving friends. Here are all of the details.
MISTI
Stamptabulous
Distress Oxide Ink- Ground Espresso
Zig Clean Color Markers
Waterbrush
Archival Ink- Jet Black
Blending Tool and Mat
Cardstock- White, Kraft
Scrapbook Adhesives by 3L- Crafty Foam Tape, E-Z Runner Petite, Thin 3D Foam Squares, 3D Foam Squares
I cut a kraft cardstock card front and blended the edges using dark brown ink. Then added the sentiment to the left-hand side using the MISTI and the Stamptabulous Tool. Adhere the card front to the white cardstock card base using foam tape.
Stamp the images onto white cardstock using black ink, and add color to the images using Zig Clean Color Markers and a water brush. Once dry, fussy cut out the images and add them to the card front using foam squares.


