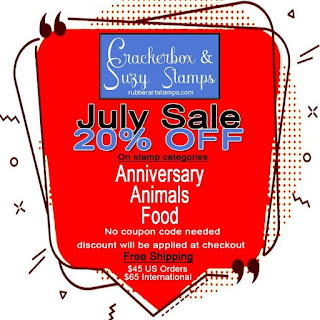
Showing posts with label Wedding Cards. Show all posts

December 31, 2024

Minions Valentine Wedding Card

Hello, friends!  Toni here sharing an unconventional Minions Valentine card that could easily be used for a wedding.


I stamped and colored Bride Kevin and Frankin Bob.  The top hat and sentiment are from Minion 1.  I positioned the images on top of the lacy heart and embossed the sentiment in red, so it really pops.  How fun!

For a full list of products used and to see my other projects, feel free to visit my blog, Frankie Helps Craft.  Have a great rest of your week!


August 13, 2023

Snarky Marriage Card

Hi Everybody! Cornelia here today. I am back with my Crackerbox Stamps post for this week. Crackerbox Stamps recently had a new release with hilariously snarky sentiments. One of which I used here.


For the background, I used patterned paper. I stamped the cards twice on scrap paper and colored them with alcohol ink markers, and cut them out. Added them to the paper and stamped half of the sentiment (I cut the stamp apart, but you can mask it if you don't want to do that). Stamped the heart and diamond and cut them out, and added them as well. Stamped the rest of the sentiment into the inside of my card.


And perhaps you want to check out those:
I hope you liked this. Thanks for visiting!
Happy Stamping!

January 17, 2022

Hello Gorgeous Elegant Card

Hello everyone!  Marcia on the Crackerbox Stamps blog today sharing a very feminine card with lots of vintage flairs. I recently bought this gorgeous stamp and thought of so many ways to use it. The image would be gorgeous on bridal cards as well, embossed in white.

Supplies used:
Black Slinky Dress
Hello Gorgeous

I began with a trimmed vintage book page. I added a thin layer of white acrylic paint to soften the text in the background. I didn't realize that the black ink used for the dress wouldn't stamp properly atop the acrylic paint (oops!) so I used a black brush marker to darken around the edges and smoothed the image with a damp paintbrush. I share my boo-boo because, well, we all make them. But it still worked out! I considered pulling out my Stazon black ink but I'm happy with the outcome. I think it lends a softer more vintage feel to the overall project as well. I stamped the sentiment onto a scrap of book page (without text) and matted it with gold foil paper as I did the front panel. To finish, I added a few clipart ephemera in pinks to up the feminine feel and break up the colors a bit. I really love how it came together.  (Link to digital ephemera on my blog HERE.)

July 11, 2020

Colorblocked Wedding Card

Hello everyone!!  Shanna here today from Caffeinated Craftiness to share some fun inspiration...
I am bringing a new card to you today featuring  Crackerbox & Suzy Stamps

Every month Crackerbox & Suzy Stamps has a new set of themes.  One of the themes for July is Weddings and Anniversaries.  I had a lot of fun creating this colorblock card featuring the Wedding Dress stamp, along with the newer Vertical Congratulations.


I started by using a masking stencil from my stash to mask and ink blending a large rectangle on my card base.  I used Distress Ink Tattered Rose for the color as I really loved the vintage feel of it.  
Next, I stamped my dress in Inkon3 Blackout ink, using a stamp platform so I could stamp a couple of times to get a crisp black silhouette.  I love red rubber stamps for this particular technique because they do a BEAUTIFUL job of stamping crisply and evenly on solid images!

I grabbed some Liquid Pixie Dust and splattered it on for some subtle sparkles.  

My sentiment was heat embossed in sterling silver embossing powder onto black cardstock and then trimmed to fit the length of the card. I mounted the sentiment strip onto the card with foam tape.


Do you make wedding or anniversary cards??  How about the inside of a card...do you normally leave it blank??  Let me know in the comments below.  


Over in the Crackerbox and Suzy Flaunt it if You Made it Facebook group there is a monthly cardmaking "theme"  and July’s technique of the month is MASKING
 **BONUS** If you combine the technique of the month with a stamp from one of the sale categories, you get a 5.00 store credit towards your next purchase of amazing red rubber goodness!

Here are the sale categories for July:


Thanks for stopping by, see you soon!
~Shanna

July 2, 2020

Forever and Always

Hello everyone!

It's Donna here sharing a card  that can be used for a wedding or anniversary.  The rubber stamps I used are Bride and Groom and the sentiment is Forever and Always.  

If you have not joined the Crackerbox and Suzy Flaunt it if You Made it Facebook group please come join the fun.  There is a monthly cardmaking "theme" and July’s technique of the month is MASKING! There is a bonus if youu combine the technique of the month with a stamp from one of the sale categories, you get a 5.00 store credit towards you next purchase of amazing red rubber goodness!  

Here is my card for your inspiration.  


My card is an A2 top folding card. I stamped the Bride and Groom with black versafine ink, I then embossed it with clear embossing powder.  I then stamped the Forever and Always sentiment with the black versafine ink and embossed it also with clear embossing powder.  I then added clear rheinstones through the brides veil for dimension. 


Another view of the card.


The July special is:


Thank you so much, I hope you have been inspired.  Please come back again soon.

June 6, 2020

Simple And Elegant Wedding Card by Nadine Carlier

Hello! Nadine here today with a simple and elegant wedding card. Sometimes simple is more!


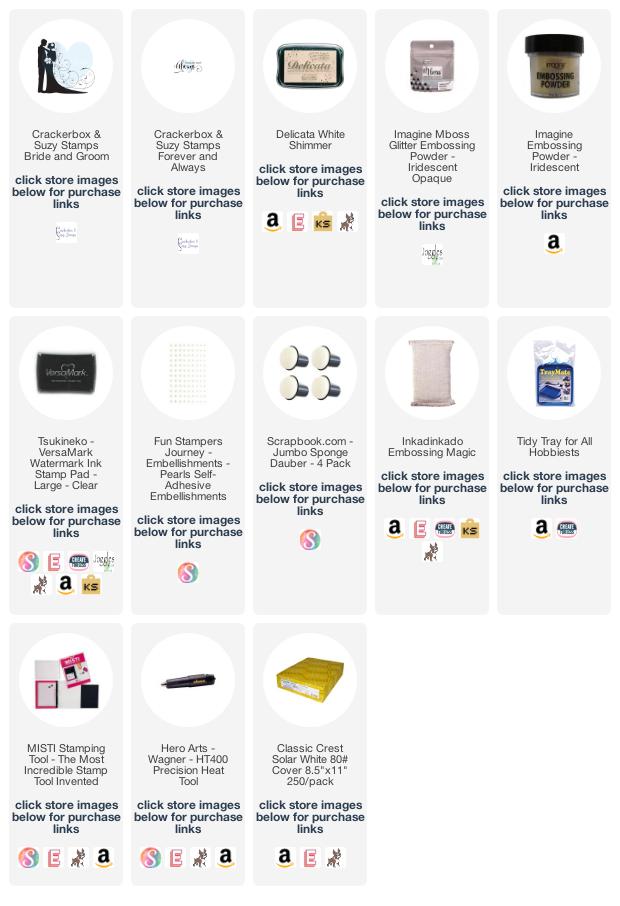
I first stamped the Bride and Groom stamp and the Forever and Always stamp with VersaMark and heat embossed it with some Iridescent Opaque Embossing Powder.


Then around the outer top edges, I stamped the swirly vail part of the Bride and Groom stamp with VersaMark and heat embossed it with some Iridescent Embossing Powder. Then using a sponge dauber and Delicata White Shimmer Ink, I blended it around the outside edges.
I created a very similar card like this one a few years ago, you can watch the video tutorial on it HERE.

Don't forget to visit the STORE and check out all of the stamps that are 20% OFF this month. All the stamps I used on my card are on sale the entire month of June.
Just add them into your cart and you will then see the discount on the stamps once they are in your cart.


Thank you for stopping by and happy crafting!
Nadine

Interested in the products I used? Products that are still available are linked to multiple shops below, for your convenience.
Lists may contain affiliate links where possible at no cost to you, what so ever. Affiliate and product disclosure can be found here.
I design for several companies because I genuinely love their products! Anything I recommend on my blog is something that I genuinely love and regularly use. I buy most of my own supplies. However, I do receive some free products to work with, and I sometimes make money for the projects I make. I DO NOT get paid for product reviews, I give my honest opinion about the products I use, and I will never recommend a product that I do not like or would not use.