Showing posts with label DT - Ericka Strange. Show all posts

June 8, 2025

Cheers To You Card

 Hello Stampers. Ericka made a quick birthday card.
A sample of quick cards is nice to have when you realize you need to create a birthday card.
After Ericka created the background, she drew an outline around the card.
The saying, Cheers On Your Birthday was stamped.
Below the saying, the Grinch Wine Glass was stamped and colored in.
The stamped and colored piece was mounted on a white card.

Stamps Used:


May 27, 2025

Inspiration Card

 Hello Stamping Friends. Ericka has a beautiful inspiration card.
This would make a great graduation card or be used for any other occasion.
For the background and flower, Ericka used Lindy's Magical powders by adding water.
The saying, The Future Belongs was stamped with VersaFine Black.
The Peony was stamped with Staz-On Snowflake White and embossed.

Stamps Used:

Product Used:

We hoped you liked the inspiration card!

May 11, 2025

Goodbyes Are Not Forever

 Hello Crafters. Ericka has made a sweet sympathy card.
Sympathy cards can be difficult, but Ericka has chosen a very nice saying.
This saying can be masked and used on the outside and inside.
Ericka made the yellowish-green background.
She stamped and embossed Phineas The Peacock.
The saying, Goodbyes was stamped in the upper left corner.
An embossing pen was used to frame the card and emboss it.

Stamps Uses:

April 27, 2025

Pet Sympathy Card

 Hello Stampers. Ericka has created one of those cards that pulls at the heartstrings to make.
On the white cardstock, Ericka stamped the Pet Circle image with light grey ink for a no-line effect.
The image was water-colored.
She stamped the saying, Gone From Your Side.
A fine-line paintbrush was used to make the border around the edge of the card.

Stamps Used:

April 8, 2025

Easter Card With Flowers

 Hello Stampers. Ericka here today with the outside and inside of an Easter card.
The Happy Easter was stamped with blue colored ink and then highlighted with a fine-tip marker.
The Tulip Bunch was stamped and colored. A light blue marker was used to outline and highlight the flowers.
The inside of the card.
The Single Tulip was stamped and colored. The same blue marker highlighted the tulip.
The saying, He Is Risen was stamped with blue ink.
Both cards were mounted on a blue card.
A blue marker was used to go around the edges of the cards for decoration.

Stamps Used:

I hope you enjoyed the card!


March 27, 2025

Bunny Hugs For Easter Card

 Ericka has made a Spring colored Easter card.
After making the background, she drew a line around the outer edges.
Towards the bottom she stamped the Bunny Butt.
Bunny Hugs was stamped above the butt.
Ericka added the Bunny Ears at the top.

Stamps Used:

Thanks for taking a look at our springtime Easter card.


March 22, 2025

Sweet Inspirational Card

 Ericka made this beautiful card for inspiration.
After creating the background, Ericka stamped the music trails on the card's borders.
The Butterfly Music was stamped and embossed in the center of the card.
The saying, Dance, Sing, Love, was masked and stamped around the butterfly in the center in three different places.
Stamps Used: 
We hope you enjoyed Ercka's Card.


February 8, 2025

A Birthday Secret Card

 Hello Stampers. Ericka made a colorful birthday card with a secret.
Ericka made the background on the white cardstock and mounted it on black cardstock.
She stamped Secret Of Staying Young at the bottom of the card.
The Big Tree 2 was stamped above the saying.
Ericka took a fine-tip marker and drew a line around the outer edge of the card.

Stamps Used:

We hope you enjoyed the humorous, colorful birthday card.

January 27, 2025

An Elegant Woman's Card

 Hello Stampers. Ericka made an elegant card with a beautiful dress and a great saying.
Ericka used the gelpress for the background and mounted it on black cardstock.
The last thing she did was draw lines around the outer edges.

Stamps Used:
Thanks for taking the time to look at Ericka's card.


December 29, 2024

A Winter Wonderland


Hello, friends!

Ericka here, bringing you a serene and peaceful winter card to close out the year. There’s something magical about winter landscapes, and today I’m sharing a design inspired by snowy days and quiet woods, featuring the beautiful Winter Butterflies sentiment along with some smaller, whimsical stamps.

Once the background dried, I stamped the Winter Butterflies sentiment, Snowflake, and Holly Snowflake Swirl using Versafine Clair Twilight ink, then clear embossed them for added depth and shine.

To bring the scene to life, I stamped the Spruce Tree in Versafine Clair Rain Forest and the Buck and Doe in Pinecone ink. These natural tones add an earthy touch, balancing the soft shimmer of the background.

For that extra touch of winter magic, I used a white gel pen to add “snow” to the stamped images and sentiment, creating the look of little snowdrifts piling on tree branches and the forest floor. It’s a simple detail that makes the scene feel so much more alive. To complete the card, I added a hint of elegance with some gold stitching—a subtle shimmer that ties everything together and gives the design a polished, festive feel.

Thank you so much for stopping by! I hope you’re enjoying these final few days of 2024, soaking up all the wintery wonder and warmth of the season. Here’s to a creative and joyful year ahead!

Happy crafting,
Ericka ❄️✨

November 27, 2024

Creating Holiday Magic: A Festive Christmas Card

Hello friends! Ericka here, and I’m back with some crafty inspiration to get you in the holiday spirit. Today, I’m sharing a mixed media Christmas card featuring a gorgeous background made with my gel press and alcohol inks, paired with the elegant Christmas Tree Fancy Swirl stamp. If you’re looking for a fun and creative way to add vibrant, one-of-a-kind touches to your holiday cards, this technique is for you! 

Creating the Background
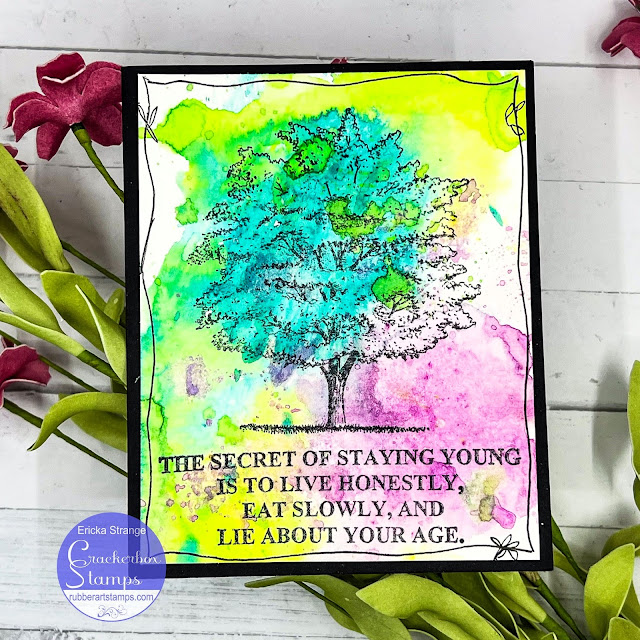
To start, I brought out my trusty gel press and a few bottles of alcohol ink in festive hues. I applied the inks directly onto the gel press and used a brayer to spread the colors evenly. Once the inks dried, I added a thin layer of white acrylic paint over the top and pulled the print. The result? A beautifully vibrant and textured background that’s perfect for a Christmas card.

Gel press prints are always exciting because no two are ever the same. The combination of alcohol inks and acrylic paint creates a stunning blend of depth and color that truly feels like magic

Stamping the Focal Image
For the focal point, I stamped the  Christmas Tree Fancy Swirl and paired it with the “Magic and Bright” sentiment. Initially, I used gold embossing powder, but I felt like the tree needed a bit more pop. So, I re-stamped the image using white embossing powder. The result? A subtle shadow effect that adds dimension and a touch of whimsy to the design.

Finishing Touches
To frame the card, I hand-drew a simple border to tie everything together. I love how small details like this can elevate a design while keeping the focus on the main elements. And just like that, another Christmas card is complete!

This project reminded me of how much joy there is in creating something unique for the holidays. With so many more cards to make, I’m grateful for moments like this where I can sit down, experiment with techniques, and share a little creativity with the world.

I hope this inspires you to pull out your crafting supplies and try something new this season. Wishing you a wonderful Thanksgiving filled with love, gratitude, and maybe a little time to craft.

Happy holidays and happy crafting!

November 8, 2024

A Grinchy Twist on Holiday Cheer


Hello, friends!

Ericka here, and today I’ve got a playful, coffee-themed holiday card that brings a touch of holiday mischief to the season! Inspired by one of my favorite Christmas characters, I used the Grinches Drink Up sentiment along with the Grinches Hand and Coffee 1 set for a unique and fun design.


To bring this card to life, I stamped the sentiment in Green Oasis Versafine Clair ink and added some sparkle with clear embossing powder. I then stamped the images, giving them a festive watercolor treatment for that holiday warmth. To top it off, I added a flurry of snowflakes for that extra Christmas feel.

And there you have it—a whimsical coffee-themed Christmas card with a bit of Grinchy charm!

Thanks for stopping by, and happy crafting!


Crackerbox Stamps
Crackerbox Stamps - Coffee 1
Shop at:
CS
Crackerbox Stamps - Grinches Drink Up
Shop at:
CS
Crackerbox Stamps - Snowflakes set of 3
Shop at:
CS
Crackerbox Stamps - Grinch Hand and Ornament
Shop at:
CS

Tsukineko - VersaFine Clair - Nocturn
Shop at:
CS


October 8, 2024

Simple Beautiful Flower Cards

 Hello there, stampers. Ericka made a couple of beautiful and simple cards to share with you.
If you need a quick thank you or get well card, these are good inspiration.
The Just Want To Say Thanks card with Tulip is a fabulous thank you card.
The get well with the saying, Hope You're Back 
with the Daffodil is quick and easy.

Stamp Used:
A set to save money - Set of 3 Flowers and Pot

Hope you enjoyed Ericka's cards.

July 8, 2024

Masculine Golf Birthday Card


Hello friends! Ericka here, and today I have a fun and quick project to share with you – a Masculine Birthday card featuring those lovable minions we all adore. Let's dive into the details of how I created this delightful card!

Stamping and Coloring the Minions

To start, I chose two of my favorite minions for this project – Kevin Golfing and Bob Golfing. These characters add a playful touch to the card, perfect for bringing a smile to anyone’s face. I stamped both Kevin and Bob onto my cardstock using a black ink that wouldn’t smudge when I added color later on. I used colored pencils to carefully color in Kevin and Bob, giving them vibrant outfits and expressive faces.

Adding the Sentiment

For the sentiment, I used the Happy Birthday Open stamp. This particular sentiment is fantastic because it allows for a lot of creativity – you can color it any way you want! I matched the colors of the sentiment to those in the minions’ outfits for a cohesive look. To give the sentiment an extra special touch, I added some glossy accents. This gave it a bit of shine and dimension, making it stand out even more.

I hope you enjoyed this quick project and feel inspired to create your own minion-themed cards. Crafting is all about having fun and bringing joy to others, and I believe this card does just that. Happy crafting, and I can’t wait to see what you create!

Until next time, Ericka


June 27, 2024

Crafting the Perfect 4th of July Card


 Hello friends! Ericka here, and today I’m excited to share a quick and festive 4th of July card I crafted using some amazing stamps and Magicals from Lindy's Gang. Let's dive into the process and the fun I had creating this patriotic card!

For this card, I combined the vibrant colors of Lindy's Gang Magicals with the adorable 4th of July Kids stamps, along with the bold God Bless America and Happy 4th Big sentiments. The result? A card that's bursting with patriotic pride and perfect for celebrating Independence Day!

Step-by-Step Process

  1. Creating the Watercolor Background: I started by applying Lindy's Gang Magicals in Autumn Maple Crimson and Tibetan Poppy Teal  to create a stunning watercolor background. These magical powders add a beautiful shimmer and vibrant color that instantly make the card pop. After letting the background dry completely, I was ready to add the next layers of detail.

  2. Heat Embossing the Images: Once the background was dry, I stamped the 4th of July Kids images onto the card. Using white embossing powder, I heat embossed these images, giving them a crisp and clean appearance that contrasts beautifully against the colorful backdrop. The white embossing adds a touch of elegance and ensures the images stand out.

  3. Adding Sentiments: Next, I incorporated the bold God Bless America and Happy 4th Big sentiments. These sentiments are perfect for a 4th of July card, adding a strong and celebratory message. I chose to emboss these in white as well to maintain a cohesive look.

  4. Drawing the Frame and Adding Stars: To complete the card, I hand drew a simple frame around the edges. This helps to pull everything together and adds a finished look. For an extra touch of patriotism, I added a couple of hand-drawn stars. These little details make the card feel complete and add to the overall festive theme.

Thank you for joining me today! I can't wait to see what patriotic projects you all come up with. Until next time, keep crafting and have a Happy 4th of July!


March 15, 2024

2024 Spring Summer Coffee Lovers Hop & NEW STAMP RELEASE

Hello and welcome to our blog! We are participating in the 2024 Spring Summer Coffer Lover Hop. What does that mean for you? There is lots of inspiration and prizes, and we also have a new stamp release.
Plus, all our Coffee, Tea, & Cocoa Rubber Stamps are 20% OFF!

Make sure to scroll through our entire post for info on the hop and how you could win a
$25 gift certificate to our store.


Our design team has created some great coffee card inspiration using stamps from our brand-new photopolymer coffee stamp sets.

Tracy used Coffee Set 2

Cornelia used Coffee Set 1 & Frog Set 1

Timothy used Coffee Set 2


Vicky used Coffee Set 1

Nadine used Coffee Set 2


Shanna used Coffee Set 2

Monica used Coffee Set 2

Now for what you've been waiting for: how to win!

Leave a comment on this post to be eligible to win a $25 Gift Code to our Crackerbox Stamps Store.
Commenting will close on March 22nd. The winner will be added to this post the next day.

Several companies are involved in this hop, so make sure to hop along to them all.
If you are already hopping along, you should have arrived here from Copictopia Creative, and your next stop is Close To My Heart by Chris Franco. For the full list of all companies involved in the hop, visit the Coffee Lovers Blog post HERE.

Click the button below to shop all of our coffee, tea, & cocoa rubber stamps. A 20% OFF discount will automatically be added to all stamps from this category.

CONGRATS TO....
Bonnie Lynn, you are the lucky winner of a $25 gift code to our store. Please email us by April 7th, 2024, to claim your prize. Our email address is on the top right of our blog.

March 8, 2024

Super Duper Birthday Card


Hello friends! Ericka here and I hope you have had a chance to check out the new Photopolymer stamps that were just released! There are so many great cards waiting to be made with them and today I am playing with the Birthday 2 set because you can never have too many birthday cards ready. I started by spraying my background with Lindy's Gang Starburst Sprays in Afternoon Delight Denim and Hottie Patottie Hot Pink. While the background was drying, I stamped the cake with Tea Dye Distress Ink and used some colored pencils to color it in. I fussy cut the cake out and then on my dried background gold heat embossed the sparkler for my cake. I white heat embossed the fun sentiment and then used a clear heat emboss to stamp some more sparklers around my card. I finished my card with a hand drawn border. Thank you for stopping by and I hope you have a chance to check out these great new stamps!

February 27, 2024

St. Patrick's Lucky Charm Card

Hello friends! Ericka here and today and I am creating a fun St. Patrick's Day card using the Leprechaun Sheamus and the Lucky Charms sentiment.

I stamped the image and sentiment in Versfine Clair Nocturn ink and clear embossed it. I then water colored the image with Lindy's Gang Magicals to give him a magical shimmer. After my card base dried, I used my sewing machine to attach it to some pattern paper and my card base. A fun card perfect for the upcoming holiday. Thank you for stopping by, and I hope you have a wonderful week!

February 19, 2024

Ignorance Is Bliss Floral Card

Hello friends! Ericka here, and today, I have a fun snarky card using the If Ignorance stamp along with the Lotus stamp.


I'm not sure why, but I love pairing a funny sentiment with florals. You can find more snarky stamps here! I stamped the If Ignorance sentiment in Versafine Clair ink and clear embossed it. I then stamped the Lotus twice in Hickory Smoke Distress Ink and colored them up with my colored pencils. Thank you for stopping by and I hope you have a wonderful week!

February 8, 2024

Bathroom Humor Card

 Hello friends! Ericka here, and today, I have a little bathroom humor in a card.

I stamped the Bathtub and Bathtub Life Saying stamps (comes in a set) on a white card base using Versafine Clair Nocturne ink and clear embossed it. I colored up the image with some Sharpies and used some blue ink to lightly blend ink around the edges. I added a hand drawn border to finish my card. I love these humorous stamps for quick cards to make friends smile. Check out some more fun ones here.