Showing posts with label Outer Space Cards. Show all posts

July 22, 2024

Humorous Astronomy Any Occasion Cards

Hello, my friends!  Toni here with you today sharing a couple of humorous cards for lovers of astronomy.


I started my card by taking a piece of designer 6x6 paper and sponging Distress Oxide Black Soot and Catherine Pooler Suede Shoes randomly on it.  I then spattered the sheet with Copic Opaque White and Peerless Transparent Gold Watercolor.

Once dry, I embossed Stars Swirl on the sheet.  I divided the sheet up and adhered the pieces to black cardstock which I then embossed with According to Astonomy (left card) and The Universe (right).  I also added more Stars Swirl to the righthand card.

For a full list of products used and to see my other projects, feel free to visit my blog, Frankie Helps Craft.  Have a great rest of your week! 

July 19, 2023

Happy Birthday Earthling Card

Hello friends! Ericka here, and today I have a fun birthday card using the Alien Funny Face along with this perfect Happy Birthday Earthling sentiment.


 I started by drawing a circle on Bristol Smooth paper and then added Lindy's Gang Outer Space Shimmer Magicals to make it look like a planet. I stamped the Alien Funny Face and clear heat embossed him, and colored him up with some Tombow Markers. After fussy cutting out my image, I stamped and clear embossed the Happy Birthday Earthling sentiment and attached my alien with foam tape. I love this fun card, and it would be perfect for anyone who loves outer space. Thank you for stopping by, and have a wonderful week!

March 31, 2023

I Didn't Forget Belated Birthday Card

Hello crafty friends! Tracy here, and today I have a fun little birthday card to share. Here are all of the galaxy inspired details.

Crackerbox Stamps Used:

First, I created a blended background using Distress Oxide Inks onto white cardstock. Heavily blending the 3 colors gave me that night sky look. Then I splattered the card front using white Media Gloss Spray. I also added some Stickles for sparkle. Let dry completely.
Stamp the images onto white cardstock using black ink. Add color to the images using Zig Clean Color Markers and a water brush. Fussy cut out the images and set them aside for now. 
Using the MISTI and black ink, stamp the sentiment to the card front. Adhere the card front to a white cardstock card base. Add the fussy cut images to the card front using foam squares.
Thanks so much for stopping by!
Tracy

January 13, 2023

Shoot For the Moon Galaxy Card

Hi Everybody! Cornelia here today. It has been a while since I have made a galaxy background. It just felt right with those dark, long nights we are having in January......

I sponged green, yellow, blue, and pink distress inks onto a white card base and then sponged over my background with black soot distress ink, sponging less over the colored areas. That way, you get a nice galaxy background, although there are several different techniques. I stamped the rocket and the moon onto scrap paper. I colored them with alcohol ink markers and cut them out. Added water drops and white splatters to my background. Let it dry well. Stamped the sentiment and stars with Versamark ink and heat embossed them. Mounted the back panel onto a slightly larger card base.

I hope you liked this. Thanks for visiting, and happy stamping!

December 27, 2021

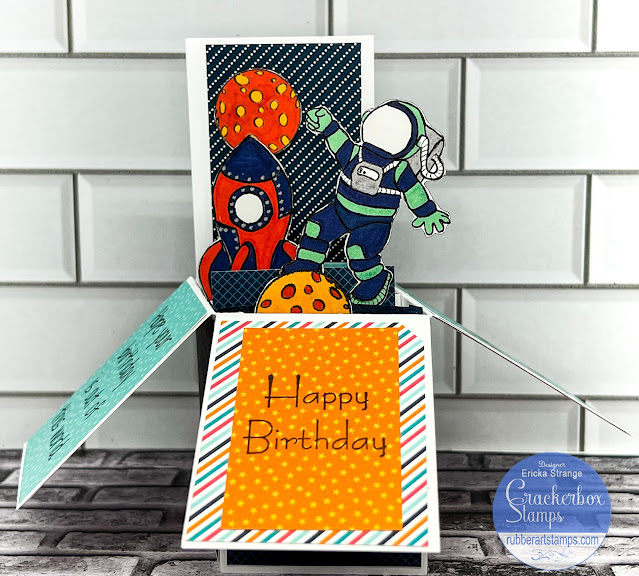
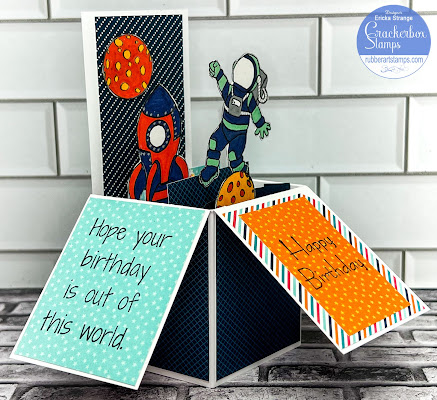
Spaceman Birthday Pop Up Card

I hope you all had a wonderful Christmas! Ericka here, and I have a birthday card I made for one of my nephews, who will be celebrating his birthday in January. He loves spaceships, so I created a box card using some pattern paper in my stash along with the Spaceman, Rocket, & Moon stamps and the Out of This World Birthday, Shoot for the Moon,  and Birthday 7 sentiments.


I started with a popup card and cut some pattern paper to fit the panels. Then, I stamped the Spaceman, Rocket, & Moon images on a separate piece of card stock and colored them up with some sharpies.
 

I stamped the sentiments around my box for some fun birthday messages.


After cutting out my images, I used double-sided tape and assembled my box, adding in my images to make a fun space scene.


 Thanks for stopping by, and I hope you have a wonderful week and a very Happy New Year.
For a list of all supplies used, click HERE.

August 29, 2021

Give a Crap Fairy Slider Card

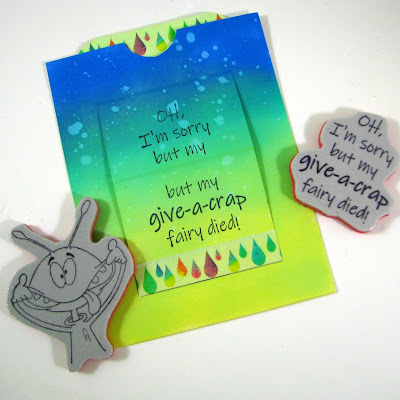
Hi Everybody! Cornelia is here today. I am sure you are now familiar with the new card kits that Crackerbox & Suzy Stamps carries in the store.  For my card, I used the slider die-cut card. 


I sponged the slider card with green and blue distress oxide inks. Added water splatters. I stamped the funny faced alien on the inside of the card. I stamped the Give A Crap sentiment on the flap.


I stamped the Na Na Na on the pull-up part of the card. Added some Washi tape and assembled everything.


 I hope you liked this. Thanks for visiting!
Happy Stamping!

August 6, 2021

Funny Alien Birthday Card using Card Kit

Hello Crafty Friends! Vicky here with a funny alien birthday card that was fast and easy to make. The space category is a great one for kids too! I used this month's, Card KitThe Card Kit is 10 Semi-Funky Fold Accordion cards.
For the card, I blended 2 shades of blue around the edges and 1 light shade for the center.
The Moon Full and the Spaceship were stamped on X-Press and colored with Copic markers.
The silver stars were glued on. The saying, Didn't Forget Your Birthday was stamped with VersaFine.

When you open the card you get all of this area to create with. I added a funny, snarky saying, Never Too Late and then added Na Na NaTo add to the humor the Alien Funny FaceThe way the card is folded, he is almost like a sweet surprise.

This is what the card looks like laid out.
Check out our card kits!

June 30, 2021

Alien Birthday Slider Surprise Card with Crackerbox & Suzy Stamps

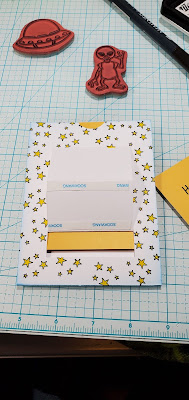
Hello, Stampers! Vicky here today with a fun surprise Slider Card. I have an alien birthday slider card to share with you. I used one of the June card kits to create my card. It is a standard A2 card that is easy and fun to make.


On the front, I stamped Open Stars sm. and colored them in.
On the front of the card, there is a folded piece for the slider and I put adhesive on the bottom part of the fold.

I stamped Out Of This World on the yellow card stock and adhered it to the bottom part of the fold.
When you pull the slider up, the front of the card will stand up.
In the window of the card, I put another piece of yellow card stock with the Alien stamped, colored, and cut out.
Behind the stand-up front is the card that is pulled to slide the front up so I used this area to add the Space Ship. I stamped the Alien again and just used his head to put into the Space Ship.
Stamps Used:

June 25, 2021

Alien Slider Card for a Belated Birthday

Hello Stamper! 
Vicky here today and I have a pretty easy Slider Card for a belated birthday. Days go by so fast I sometimes have to send out a belated birthday card. I sponged the front of the card.
The saying, Didn't Forget Your Birthday was stamped with VersaFine and mounted. Just the bottom of the saying is adhered to the slide-up flap.


When you pull up the slider, you gt to see the hidden Alien Funny Face!


There are also messages on the pull-up flap.


You can find the cards and stamps here:
Hope you liked the Slider birthday alien card!

June 20, 2021

20th Anniversary with 20% OFF and New Release!

Hello, Stampers Vicky here today
I have made a side flap card with our NEW RELEASE!
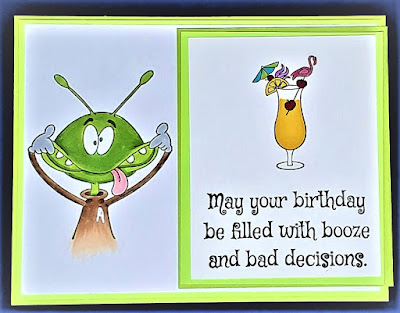
I really love this funny Alien, I think I will be using him a lot.
Birthdays can be so much fun!

I mounted the white card stock on 2 layers of light and medium green card stock.
I did the same colors on the panel on the right.
The panel on the right opens and the saying is under it. 

What I like about the side flap is that it still shows the Alien with the inside saying.
I am also going to use this saying with some of our lady stamps.
Check out our NEW RELEASE!


Thank you for your continued support!

June 18, 2021

20th Anniversary Sale and Newly Released Stamps


We would like to thank all of you great stampers who have been there for the last 20 years, because of you we are still here today!
To thank you for your loyalty, we would like to offer you 20% OFF all regularly priced items in our store plus FREE SHIPPING for all orders in the US through June 20th.

We are also offering FREE STAMPS!
All you have to do is spend $35 in our store and add the BFF & Emoji Stamp into your cart the price will automatically be $0.


That's not all.... if you spend $65 in our store and add the Cheers On Your Birthday Stamp into your cart the price will also automatically be $0. This is also a brand new stamp that was just released in the store.


We can't have an anniversary celebration without a new stamp release.
Our design team has created some fabulous cards showing off some of our new stamps.


To see all of our new release stamps click HERE to see them all in our store.

June 17, 2021

I Didn't Forget Card

Hello stamping and cardmaking friends! Tracy here and today I have a fun little Out of This World birthday card to share. Here are all of the details. 


Other Products Used:
Cardstock- White
Staz On Ink- Jet Black
Zig Clean Color Markers
Waterbrush
Gelly Roll Pen- White
Distress Oxide Ink- Black Soot, Wilted Violet, Peacock Feathers
Blending Tool and Mat
Water Mister
Heat Gun
Embossing Pad
White Embossing Powder
Scrapbook Adhesives by 3L- Thin 3D Foam Squares, 3D Foam Squares, Crafty Foam Tape, E-Z Runner Grand

First I created a night sky blended background using Distress Oxide Inks. First you start with the colours you want to peek through in the sky, blending onto white cardstock. Then you cover the whole card front using the black soot ink. Mist the piece with water, and let the ink react. Then heat set the whole thing.

Next Stamp the sentiment onto the card front using an embossing pad and white embossing powder. Now using a white pen, add the stars to the background. Mat the card front in white cardstock then add to the white cardstock card base using foam tape.


Next, stamp the images onto white cardstock. Add color to the images using Zig Clean Color Markers and a waterbrush. I also stamped the emoji image into the middle of the aliens t-shirt just for fun haha. Fussy cut the images and add to the card front using foam squares of different thicknesses to add dimension.

Thanks so much for stopping by!

June 14, 2021

More out of this world Box Card Fun!

Hello and Welcome! This is Shanna from Caffeinated Craftiness with another fun project featuring Crackerbox & Suzy Stamps!!

Today I am showing you another fun and interactive box card kit from Crackerbox & Suzy Stamps in collaboration with The Paper Cut! These two new kits feature box cards that come pre-cut and scored. NO math, NO die-cutting, NO fuss!! In each kit, you get 5 blank card bases and 3 stamps that help complete your card!

My card today features Card Kit 8 and was so much fun to create!

I stamped and Copic colored the images and then fussy cut them out.  I decided the UFO needed a little beam coming from under it, so I proceeded to laminate some starry sequins into a laminator pouch and cut it with my paper trimmer afterward!  I love how it adds a little extra, and actually attaches the UFO to the card!  The little alien is coming in peace, and was a ton of fun to color!


The sentiment that comes with this kit just makes me giggle.. Because we ALL have "those moments" lol. I heat embossed the sentiment in white embossing powder onto some patterned galaxy paper from my stash. Fun right


One of the coolest features of a box card is the fact they fold completely flat to still fit in an envelope too for mailing. There is an option to purchase only card blanks if you'd prefer to use different stamps.  You can find them HERE.

By the way... ALL the card kits, including both NEW ones for June, are on SALE!!!!
You save 20% on one, or 25% when you buy both kits!!  YAY for saving moo-lah!


You can find more inspiration, and share your own fabulous projects in the Crackerbox and Suzy Flaunt it if You Made it Facebook group!  
 
That wraps up my post for today, I will be back here soon with another dose of red rubber inspiration!  Be sure to follow along with me over on Instagram and Facebook to keep up with all my caffeinated adventures!  Till next time, bye!

June 13, 2021

Abducted by Aliens Belated Birthday Card

Hi Everybody, Cornelia here today. Some of the products I have used have been provided to me by various companies I design for. Affiliate links may be used in the links provided below.

 You may be familiar with the new card kits that Crackerbox & Suzy Stamps carries in the store. The card kit for June is an A2 pop-up box card. But I just used the stamps to make a regular card here.


 Here is the  Card Kit 8 I used:


 I started with patterned paper and sponged all those white stars with different kinds of distress oxide inks. I cut out the stamps and colored them with Inktense and water brush markers. I heat embossed the sentiment and cut it apart. Added little strips of patterned paper at the bottoms of the sentiment strips. Assembled the card, using foam tape for the alien and UFO.


I hope you liked this. Thanks for visiting!
Happy Stamping!

June 11, 2021

Out of this world Card

Hello there, Martha Lucia here! Today I have a fun card featuring the monthly card kit #7 from Crackerbox & Suzy StampsThe card kit for June is an A2 pop-up box card.


I cut some designer paper for the background and for the flaps of the box. Then, I stamped the astronaut, rocket, and moon onto white smooth card stock and colored them with Illustrator Markers from Spectrum Noir. 
Additionally, I fussy cut them with scissors and left them aside for a while. I also added those cuts to the inside partitions with strips of vellum card stock.


I stamped the sentiment onto the front flap with VersaFine Pigment Onix. 
Tip: it would have been better to do that before you adhere to the paper.


As a final touch, I just added some tiny superhero stars made with clay that I pasted over the flaps of the card with Glue Pend Dual Tip.


This is the kit that I used to make my card. But if you noticed I used one additional stamp. It is because this month we have some additional stamps that work wonderfully with the monthly kits. You can find them in Crackerbox & Suzy Stamps Store.


You can find all the products that I used on this card listed HERE 

Thank you for stopping by!