Showing posts with label DT - Ericka Strange. Show all posts

November 27, 2021

Grinch Christmas Ornaments

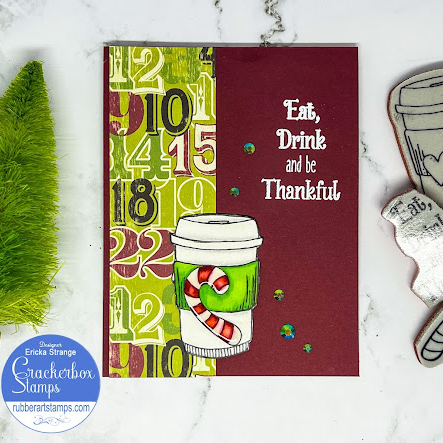
I hope you all had a wonderful Thanksgiving! Ericka here, and today I am sharing a couple of Christmas ornaments I made using several of the Grinch stamps.

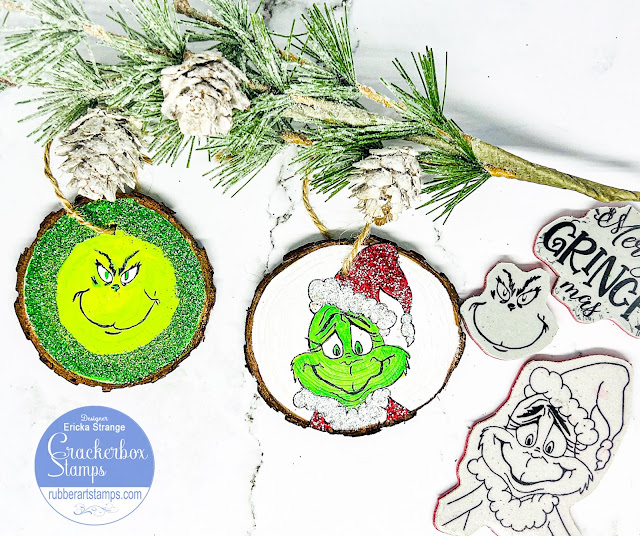
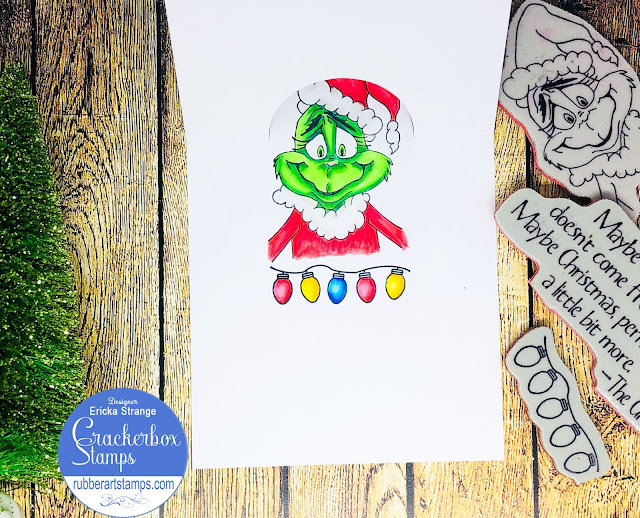
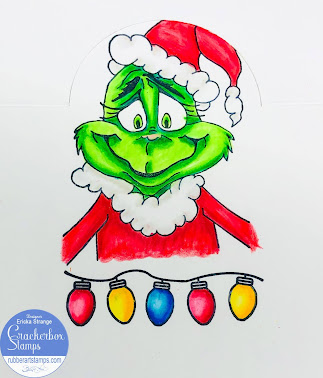
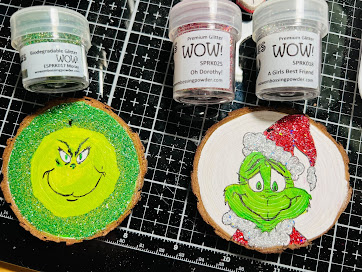
I had these wood rounds in my stash from last year and thought it would be fun to make some Grinch ornaments. I started using a layer of white gesso on the rounds and then stamped the Grinch and Grinch Face of them using Archival Ink.


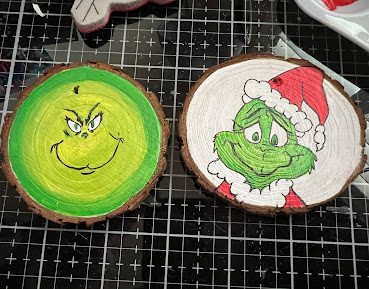
I then painted them up with some acrylic paint and retraced the lines using a black permanent pen. I wanted to add some more fun to them so used a layer of Multi Medium Gloss and added some WOW! glitter to them. 

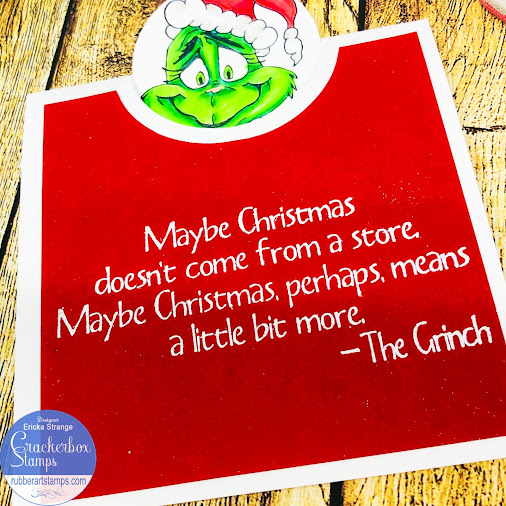
Once dry, I added another layer of the Multi Medium Gloss to the ornament to seal it. When the front was completely dry, I stamped the Grinch mas sentiment on the back and heat embossed it with green sparkle embossing powder.


I love these fun ornaments and can't wait to get them up on my tree.
 Thanks for stopping by and I hope you have a wonderful week. 
For a list of all supplies used, click HERE.

November 19, 2021

Candy Cane Coffee Cup Christmas Card

Happy Friday! Ericka here, and today I am sharing a fun coffee lover's Christmas card.

I started by stamping the Coffee Cup Heart stamp and masking the heart and instead used the Candy Cane. I used my Sharpies to color up my cup along with a little gray colored pencil on the cup. I love this pretty coffee cup and it is so easy to add another image to the cup. I cut out the cup and used glossy accents to add shine to my candy cane.


I had this fun Christmas paper in my stash and cut a strip of it to add to my card base. I added my cup with foam tape to the base. I then stamped the Eat, Drink, Thankful sentiment and white heat embossed it. To finish my card, I added some fun green gems. 

 Thanks for stopping by and I hope you have a wonderful week. 
For a list of all supplies used, click HERE.

November 12, 2021

2021 Fall | Winter Coffee Lovers Blog Hop

 Hello and welcome to our blog! We are participating in the 2021 Fall/Winter Coffee Lovers Blog Hop.

What does that mean for you? Lots of inspiration and an awesome sale!
Read on for more info on the hop and how to win a $25 gift certificate to our store is listed at the bottom of this post.

ALL of our Coffee & Tea stamps are 30% OFF.
Discount will automatically be applied at checkout.

Our design team has created some cards using some of our stamps from our Coffee & Tea category to give you some inspiration. Check out their beautiful cards below...


Vicky has used stamps... Happiness Is, Hot Cocoa, and Hot Chocolate Mug

Cornelia has used stamps... Hot Chocolate Mug, Side Reindeer Lg., and 'tis the season

Ericka used the stamps... Coffee Cup 50's, Fill Your Heart, and Buffalo Background

Tracy used the stamps... Grinch Image, Coffee Cup Heart, and Bah Humbug

Now for what you've been waiting for, how to win!

Leave a comment on this post to be eligible to win a $25 Gift Certificate to our Crackerbox Stamps Store. Commenting will close on Friday, November 19th at 11:59 pm pacific and the winner will be contacted soon afterward.

For the full list of sponsors and all the companies in the hop, visit the Coffee Loving Blog post HERE to hop along for a chance to win more prizes.

Don't forget to shop our Coffee & Tea stamps for 30% OFF all of our Coffee & Tea stamps

November 8, 2021

Grinch Christmas Card

Happy November! Ericka here, and today I'm creating a fun Christmas card using the Bib Overlay Card with the Grinch stamp along with the Grinch Saying sentiment. 


To create my card, I stamped the Grinch stamp on the inside along with the Christmas Lights stamp. I love this Grinch and he was so fun to color.

I then stamped the Grinch Saying sentiment on the red bib and heat embossed it in white to add to the front of my card.
 

 Thanks for stopping by and I hope you have a wonderful week and don't forget to check out the Card Kit on sale now!
For a list of all supplies used, click HERE.

October 27, 2021

Happy Thanksgiving Leaf Card

Happy mid week! Ericka here, and today I'm getting ready to send out some Thanksgiving cards. I created my Thanksgiving card using the Layered Cards along with the Skeleton Leaf stamps along with the Happy Thanksgiving Wishing sentiment. 
 

To create my card, I stamped the Maple LeafSkeleton Leaf 1, 2, and 3 and heat embossed them in gold. I love these beautiful leaves and the gorgeous details.

I used a little distress ink in Walnut Stain around the edge of the green background and added some twine. I stamped the Happy Thanksgiving Wishing sentiment and added it to my card with foam tape.
 

 Thanks for stopping by and I hope you have a wonderful week and don't forget to check out the Card Kit on sale now!
For a list of all supplies used, click HERE.

October 19, 2021

Thanksgiving Pumpkins Card

Hello friends, Ericka here, and today I'm creating a Thanksgiving card using the Layered Cards along with the Swirl Pumpkin stamp along with the Blessings of Thanksgiving sentiment. I love this sentiment and it's perfect for a day of celebration.

 
To create my card, I stamped the sentiment and pumpkins in Versamark black ink and clear heat embossed it. I then colored up the pumpkins with my colored pencils and added a little white gel pen to them.

 
I used some twine and added a bow to finish my card.

 Thanks for stopping by and I hope you have a wonderful week and don't forget to check out the Card Kit on sale now!
For a list of all supplies used, click HERE.

October 8, 2021

Snarky Thanksgiving Card

 Hello friends, Ericka here, and today I'm creating a fun and snarky Thanksgiving card using the Card Kit #16 which includes the Turkey Goofy stamp along with the Fat Pants sentiment. I love this fun turkey and the sentiment is perfect for a day of celebration and food.


To create my card, I took the included card base and green layer and glued them together. I then used a stencil with Distress Oxide in Crackling Campfire to add leaves to my background.
 
I stamped the Turkey Goofy and clear heat embossed it. Next, I colored him up with my Zig markers and added a little sparkle pen. I cut him out and attached him to my card using foam tape for added dimension.
 
 
To finish my card I used the Fat Pants sentiment and clear heat embossed it.

 Thanks for stopping by and I hope you have a wonderful week and don't forget to check out the Card Kit on sale now!
For a list of all supplies used, click HERE.

September 27, 2021

Wicked Looks Good On You Tag

Hello crafty friends, Ericka here, and today I'm creating a Halloween tag using the Witch's Boots along with the awesome Wicked sentiment. I love these boots and they paired so well with this sentiment.


I started with a tag that I had previously made using Distress Crayon with a stencil (the green was perfect for Halloween). I stamped  Witch's Boots with Copic friendly ink and colored them up. I added Nuvo Drops to the boots to give them a patent leather look and then added Ranger Stickles Glitter Glue on the socks for sparkle.

 
I stamped the sentiment and white heat embossed on black cardstock. Next, I added a fun black flower I had in my stash for an extra embellishment.
 
 
To finish my tag, I added this fun Halloween cat ribbon.
 Thanks for stopping by and I hope you have a wonderful week and don't forget to check out the Card Kit on sale now!
For a list of all supplies used, click HERE.

September 19, 2021

FaBOOlous Halloween Card Using Kit #14

 Hello friends, Ericka here, and today I have another fun candy-filled Halloween card using Card Kit #14. I love the spooky house stamp included in this card kit and it is perfect for Halloween treats.


This card kit comes with two stamps and is super easy to figure out. It even comes with a plastic bag to add some yummy goodies. I started stamping the house and clear heat embossing it. I colored it up with my colored pencils. 
 

 I stamped the sentiment and clear embossed that as well. Then I did a little ink blending on the background. I used Distress Oxides in Twisted Citron to make a moon. I then took Wilted Violet and Dusty Concord and blended it around the card. I spritzed a little water on top and pulled it up with a paper towel to add some texture.
 
To finish my card, I used a Tim Holtz #23 stencil with Black Soot to add some fun and spooky elements. I added my treats and can't wait to give it to a friend on Halloween.

 
 Thanks for stopping by and I hope you have a chance to play with this great Card Kit on sale now!
For a list of all supplies used, click HERE.

September 8, 2021

Treats for a Witch Halloween Pouch Card

Hello friends, Ericka here, and today I have a fun candy-filled Halloween card using Card Kit #13. This card kit is perfect for Halloween or anytime you want to add a little treat to a card.


This is another fun card kit and was easy to figure out and comes with a plastic bag to add some goodies. I started by using my gel press with acrylics for a gel print on the card kit paper. I then took a triangle die-cut and used it in the middle of the card for a peek through the window.
 

 I then stamped the witch legs on a separate piece of paper and colored it up. I added some Nuvo Clear Drops to the boots to give them a shiny look.
 
 
I fussy cut out the image and attached it to my card base and added the fun sentiment (included in the kit) and white heat embossed it.  I added my candy to the bag (I only had jelly beans on hand but candy corn would be a perfect option.)

 
 Thanks for stopping by and I hope you have a chance to play with this great Card Kit on sale now!
For a list of all supplies used, click HERE.

August 19, 2021

Birthday Giraffe Card

Hello friends, Ericka here, and today I have a fun birthday card using Card Kit #11 along with a Birthday sentiment to create a colorful birthday card.


This is another fun card kit and was easy to figure out. I love this giraffe and his expression, kind of like he was told to say 'cheese" for a picture. lol  I started out stamping the giraffe which is included in the card kit and colored him up with some Zig Watercolor Markers.
 

 I fussy cut him out and then worked on cutting out my pattern papers to match the card base. I attached my giraffe and then stamped the included sentiment and heat embossed it in white.
 
 
I added the Birthday 6 sentiment on the inside with just enough space to write a fun message to a friend.  
 

 Thanks for stopping by and I hope you have a chance to play with this great Card Kit on sale now!
For a list of all supplies used, click HERE.

July 27, 2021

Balloons and More Balloons Birthday Card

Hello friends, Ericka here, and today I have another birthday card using Card Kit #9 along with some balloon stamps. I love how easy it is to create a variety of cards using the card kit.


This is a fun card kit and I love the cutouts and all the ways you can use them. I started out stamping the Girl with Balloons with Catherine Pooler Inks. These inks are super juicy so I took a small watercolor brush and used it to color in my balloons. I also wanted lots more balloons so I stamped the balloon portion three more times around the girl and added a small arm.
 
 
I added the  Love Balloon to the panels in the same inks and then used my white gel pen to add in some light lines.  
For the inside, I stamped the Love Balloon again and added a "sneak peak" sentiment that will be available in August.  To finish my card I added the Birthday 1 sentiment.
 
 
Thanks for stopping by and I hope you have a chance to play with this great Card Kit on sale now!
For a list of all supplies used, click HERE.

July 19, 2021

Fishy Birthday Card

 Hello friends, Ericka here, and today I have a fishy birthday card using Card Kit #9 along with some fun fish stamps. These card kits are great because you can use them to create a bunch of different cards using a similar layout.

This is a fun card kit and I love the cut outs and all the ways you can use them. I started out stamping the Pluto Octopus in Copic friendly ink. I also stamped the Fish in the Sea sentiment as well as the Fish Stripe and Fish Polka Dots on the tabs. I used my Copics to color them all up and then got to work on the inside of the card.
 
 
I stamped the fish along with the Bubbles and the Birthday 1 sentiment on the inside and colored them up. A tip to remember is that if you stamp an image on the tap, you can try to line it up with the stamp on the inside of the card. I thought of this after I already stamped my first Polka Dots fish on the inside of my card. The second one lined up well with the tail of the fish on the bottom tab.


All in all, this was a super fun birthday card to make. Thanks for stopping by and I hope you have a chance to play with this great Card Kit on sale now!


For a list of all supplies used, click HERE.

July 8, 2021

Summertime Card Kit #9

Hello friends, Ericka here and today I have a summertime birthday card using the Card Kit #9. 

 
This is a fun card kit and I love the cut outs and all the ways you can use them. I started out stamping the flower stamp included in the card kit. I then used some Catherine Pooler inks to stamp a portion of the sentiment in different colors on the tabs.
 
 
I colored the image up with my colored pencils. I the stamped the inside of the card with the same inks using the Birthday 1 stamp along with the Butterfly 1, 2, and 3.


I finished by adding a little colored pencil detail to my butterflies. All in all, this was a super quick birthday card to make. Thanks for stopping by and I hope you have a chance to play with this great Card Kit on sale now!

For a list of all supplies used, click HERE.