Showing posts with label Snarky & Funny Cards. Show all posts

April 23, 2024

Happy Father's Day

Hello, Timothy here today with a fun Father's Day Card.

 I stamped and colored this adorable Frogs Set 1 stamp. 
Next I stamped three sentiments from the Father Set 1 stamp set.
I layered the pattern paper with kraft cardstock.
I added some green enamel dots to finish off the card.

Stamps Used

I hope you have a fantastic day!
Timothy

April 22, 2024

Nope Not Today | Quick and Easy Cardmaking

 Hello and Welcome! This is Shanna today with a quick and easy card featuring some fun stamps from Crackerbox Stamps!


Today's card features the following stamps:

Nope Not Today

Magnolia Stellata


The card features the Magnolia Stellata stamped in teal ink repeatedly onto a white die cut doily shape to create a background pattern.  Next I used white pigment ink on teal cardstock with the Nope Not Today sentiment.  I chose an off-centered focal point for added interest, and the card was assembled and completed!  See?!?  I told you it was quick and easy!


Thanks so much for stopping by today--I hope you join me again soon for another fun project featuring Crackerbox Stamps!

~Shanna

April 18, 2024

New Release And Sale!

Our design team has some fabulous cards they made with our
 new polymer and rubber stamps. Check them out below!

Here is Timothy's card. Go HERE for the Message Board Set

Here is Timothy's card. Go HERE to the Father's Set

Here is Cornelia's Card. Go HERE for the Miss Daisy Set
Here is Toni's card. Go HERE for the Mother Set

Here is Janet's card. Go HERE for Miss Daisy Set

Here is Janet's card. Go HERE for Miss Daisy Set

Here is Shanna's card. Go HERE for Father Set

Here is Toni's card. Go HERE for Miss Daisy Set

Here is Janet's card. Go HERE for Miss Daisy Set

Here is Monica's card. Go HERE for Miss Daisy.

Here is Vicky's card. Go HERE for Father Set


The Crackerbox Team wants to thank you for taking the time to look at their work.
Have a great day!


Solid Friendships Card

Hello crafty friends! Tracy here, and today I have a fun little snarky card to share. Let's share some more laughs. Here are all of the details.


Crackerbox Stamps Used:


Other Products Used:
Distress Oxide Ink- Cracked Pistachio
Media Gloss Spray- Fuchsia 
Archival Ink- Jet Black
Glossy Accents
Zig Clean Color Markers
Waterbrush
Scrapbook Adhesives by 3L- E-Z Runner Petite, Thin 3D Foam Squares

Start by cutting a white cardstock card front and a card base. Do a simple blend around the card front using light green ink. Then splatter the pink mister around the edges. 

Stamp the sentiment to the right hand side of the card front using black ink. Adhere this to the card base. Stamp the Lucy image onto white cardstock and add color to the image using Zig Clean Color Markers and a waterbrush. Fussy cut out the image and add Glossy Accents to the goggle lens. Let dry completely. Add the Lucy image to the card front using foam squares. 


Thanks so much for stopping by!
Tracy


April 16, 2024

Cow Themed Birthday Card

Hello, hello!  Toni here with you today sharing a cow-themed birthday or any occasion card for the anyone in your life who needs a good chuckle.

I used Cow 2 Bernice as the main image and adhered her on top of some farm-themed designer paper and a doily fashioned into a sort of fair winning ribbon.

Next I embossed the fabulous Amazing Things sentiment and popped it up on some foam tape.

For a full list of products used and to see my other projects, feel free to visit my blog, FrankieHelpsCraft.  Have a great rest of your week!

April 13, 2024

Duck when Life is Hard

Hi Everybody! 

Cornelia here today with a fun wobble card. 

Some of the products I have used have been provided to me from various companies I design for. Affiliate links may be used in the links provided below.  I made the background with photo paper and distress ink smooshing. Istamped the duck onto scrap paper, colored it with alcohol ink markers and cut it out. Trimmed the card bottom with a scallopped border die (Funky Fossil ) and added a strip of blue paper at teh bottom of my card base. Stamped the sentiment. Attached the duck with an action wobble.  

The products I used:
And perhaps you want to check out those:
I hope you liked this. Thanks for visiting!
Happy Stamping!

April 4, 2024

Happy Beer-thday!

Hello Crackerbox friends! Tracy here, and today I have another fun birthday card to share featuring one of the new stamp sets from Crackerbox Stamps. Here are all of the details.


Crackerbox Stamps Used:

Other Products Used:
Distress Oxide Ink- Tumbled Glass
Blending Brush
Archival Ink- Jet Black
Stickles
Cardstock- White
Zig Clean Color Markers
Waterbrush
Scrapbook Adhesives by 3L- E-Z Runner Grand

Cut a card front and a card base from white cardstock. Blend just the edges of the card front using blue ink and a blending brush. 
Stamp the beer glass image along the bottom of the card front using black ink, and stamp the sentiment in the middle of the card front using black ink again. Add color to the beer images using Zig Clean Color Markers and a waterbrush. Adhere the card front to the card base. Add Stickles to each of the beer mugs and let dry. 


Thanks so much for stopping by!


March 30, 2024

Coffee Humor Card

Hello Fellow Stamper. Vicky is here today with a bit of coffee humor.
I first placed the cup from Coffee Set 1.
I used the saying and spoon from Coffee Set 2.
When I added the flowers from Flower Set 1, I stamped the solid part first and then the outline.

Stamps Used:

Check out all of the sets HERE!
Thanks for taking the time to look,
Vicky


March 26, 2024

Coffee- Adulting is Hard

 Hello crafty friends! Tracy here, and today I Have a fun little coffee themed card to share. This card is created with one of Crackerbox Stamps' newest sets. Here are all of the details.


Crackerbox Stamps Used:

Coffee Set 1

Other Products Used:
Cardstock- White
Distress Oxide Ink- Vintage Photo
Staz On Ink- Timber Brown
Archival Ink- Jet Black
Zig Clean Color Markers
Waterbrush

Cut a white cardstock card front and a white cardstock card base. Stamp the coffee cut image onto the middle of the card front using black ink. Then stamp the image onto a separate piece of white cardstock. Stamp the sentiment in the cup portion of the second stamped image. 

Blend the outside edges of the card front using a blending brush and brown ink. Stamp the coffee bean image around the edges using a darker brown ink to create the border.

Add color to the images using Zig Clean Color Markers and a waterbrush. Fussy cut out the cuff from the second image and adhere it to the card front using foam squares. 


Thanks so much for stopping by!
Tracy


March 20, 2024

Adulting Hard Coffee Card

 Hello Crafters. Vicky here today. 
Isn't that cup of coffee the best way to start the day? I know it sure does help.
I mounted the embossing card stock on an embossed card.
The coffee cup, saying, and beans are from Coffee Set 1.
The saying does fit on the cup, but I decided to put it to the side.
The cup is stamped on printed paper and cut out. I also stamped just the top of the cup, colored it to look like coffee, and glued it on.
Are you having a good time hopping the Coffee Lovers Hop? You can find out the info HERE

Enjoy your week,

March 17, 2024

March 14, 2024

Just say Cluck It! | Fun-Fold All Occasion Card

Hello and welcome! This is Shanna today, and I have a brand new card to share featuring one of the BRAND NEW polymer stamp sets from Crackerbox Stamps!  

This card features the Prissy stamp set, which was released earlier this month. That chicken is absolutely hilarious to look at. I also appreciate that the image works well in designs, both colored and uncolored—it definitely adds to the versatility!

Today's card is a gate-fold card. That means the front opens with two folded panels opening from the center rather than a traditional side fold. Gate-fold cards are a lot of fun to play around with when designing. I usually place something called a "belly band" around them to help hold them closed, but then I ran across a tutorial for a "slide lock" and knew I needed to make one!

My card features one of the sentiments from the new Prissy stamp set on the front--the scallop framed circle is actually the slide lock!  I stamped the fun chicken image and some feathers on a white circle--then stamps the sentiment right over them in a darker ink color.  I grabbed a blending brush to tone out the white with a light brown as well and then added the circle to the larger scalloped circle!  

The "slide lock" is actually 3 squares cut identical in size-- in this case 2.25".  you fold two of the squares in half--and then nestle them up to each other with the folded edges in--gluing half down to the third square.  The picture probably explains this a lot better! LOL. Then the slide lock is able to slide over the gate fold panels and "lock" them in place!  I will definitely be using this technique again in the future!  It can be modified to any symmetrical shape.

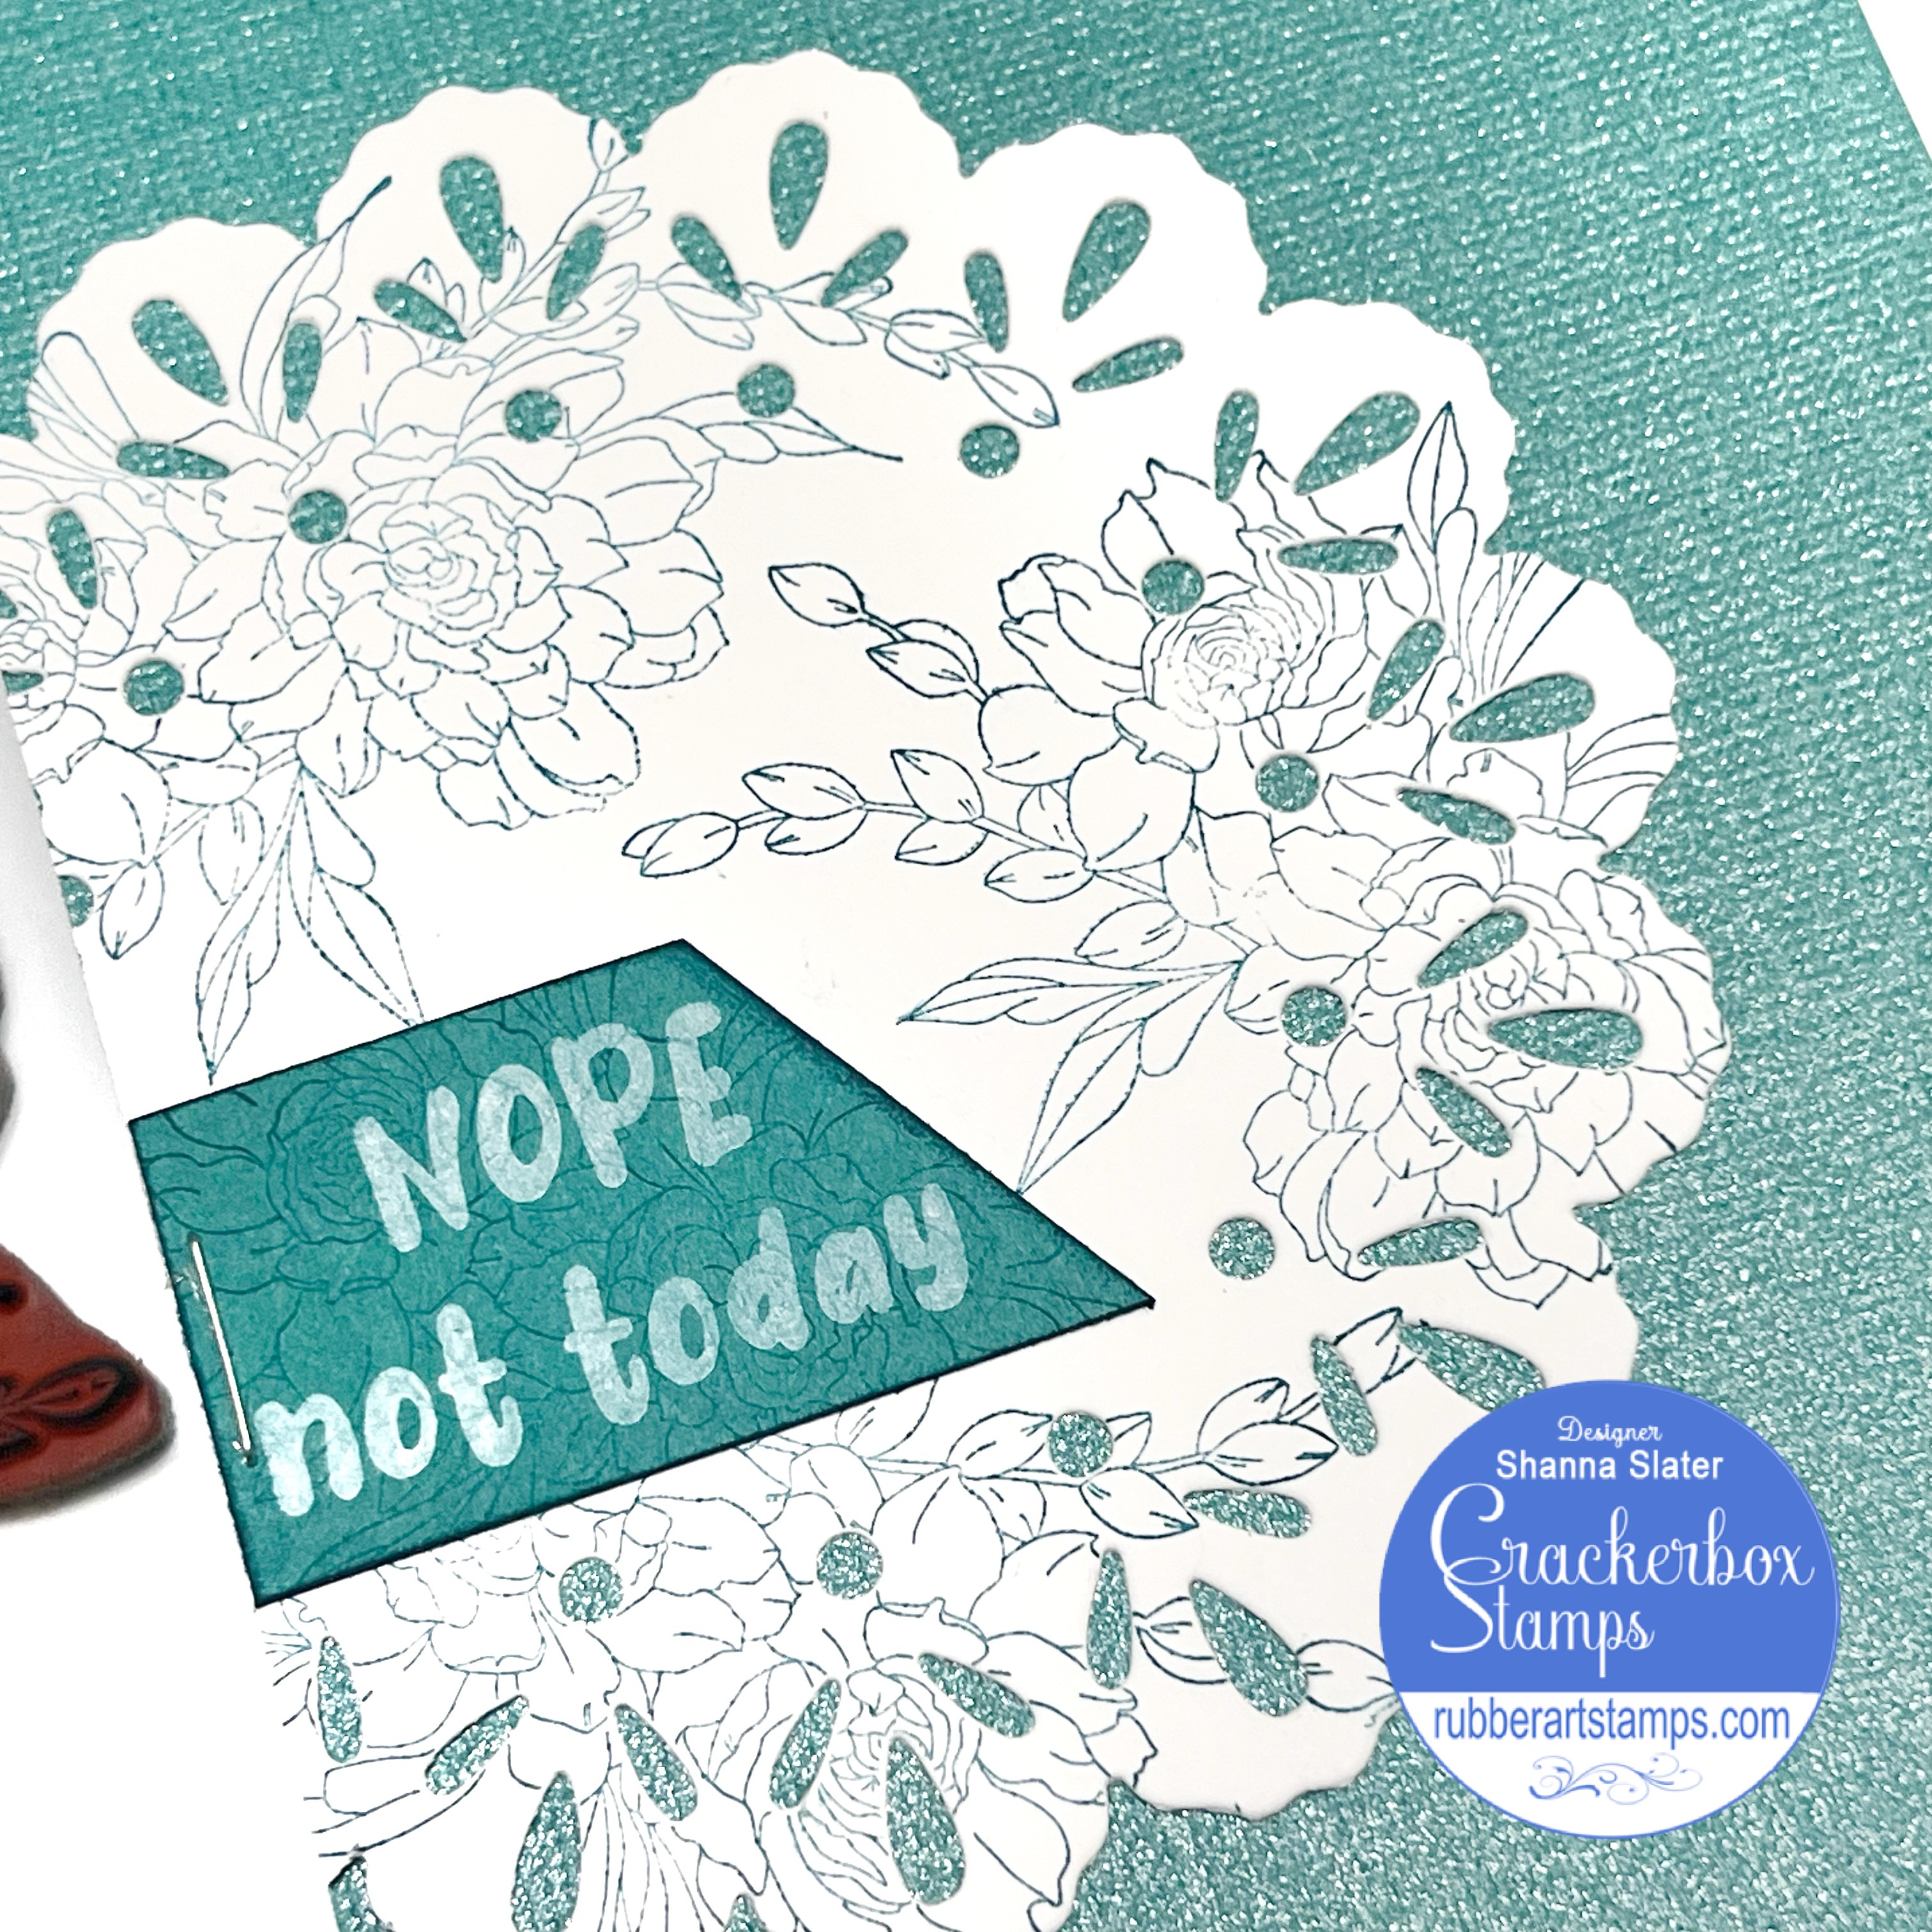
The inside of my card has another sentiment from the Prissy stamp set and the chicken is stamped again as well.  I used my distress oxide inks to mimic a "leather" look for the inner panel and love how it turned out!

Thanks so much for stopping by today!  I hope you enjoyed my project.  Be sure to head over to the Crackerbox Stamps shop to see all the new polymer sets--and of course check out the sale category while you are there! See you all again soon! ~Shanna

March 11, 2024

Cat Friendship Card

 Hi, friends!  Toni here with a snarky friendship card to brighten up your day.

I used a stencil and Distress Oxide to create the clouds in the background behind the cityscape, which consists of glitter rainbow washi applied to thin cardstock and then diecut.  I added the Space Needle in black to make it pop out.

I colored up the cute Cat Friends stamp using Copics.  Aren't they adorable taking a selfie in front of the Space Needle?  The Without Me sentiment was the perfect finishing touch.

For a full list of products used and to see my other projects, feel free to visit my blog, FrankieHelpsCraft.  Have a great rest of your week!

March 8, 2024

A Funny Birthday Card

Hello Stamper. Vicky is here today with a funny birthday card. 
This saying is fun, and I love the vulture.
The saying and the Vulture are in one of our new polymer Birthday Set 1.
I added one of our rubber stamps for the Branch With Leaves.
 
Have a great weekend!


March 7, 2024

Fairy Birthday Card

Hello Crafters. Vicky is here today with a fairy birthday card. 
Who doesn't like a little chuckle on their birthday?
I used our cute little Fairy Godmother with the saying Birthday Fairy.
I used VersaFine Clair Blue Bell Ink for the saying.


Hope you have a great week!
Vicky


March 5, 2024

Cluck it!

  Hi Everybody! 

Cornelia here today with my Crackerbox Stamps post for this week. Did you see that Crackerbox Stamps just came out with new sets of clear stamps? I am using the set Miss Prissy here. Those sentiments are just hilarious!

Perhaps you want to join in with our Instagram hop - commenting is still open until March 8th and you can win one of the awesome new clear stamp sets!

Some of the products I have used have been provided to me from various companies I design for. Affiliate links may be used in the links provided below.  I first stamped the chicken and then stamped it again with light grey ink.. Colored it with alcohol ink markers.  Stamped the sentiment. Added Crystal Laquer to the glasses.

The stamps I used:
And perhaps you want to check out those:
I hope you liked this. Thanks for visiting!
Happy Stamping!


February 26, 2024

Strangers and Best Friends Card

 Hey crafty friends! Tracy here, and today, I have another installment of Snarky Fun Cards to share! Who doesn't love a good little giggle. Here are all of the details.


Crackerbox Stamps Used:

Cut a white cardstock card base and a white cardstock card front. Blend the outer edge of the card front using purple ink and a blending brush. Stamp the sentiment in the middle of the card front using black ink. 
Stamp the flower images onto white cardstock and add color to them using Zig Clean Color Markers and a water brush. Fussy cut out the flowers and add them to either side of the snarky sentiment using foam squares. Add the card front to the card base. Then, add pink pearls around the flowers.

Thanks so much for stopping by!

February 19, 2024

Ignorance Is Bliss Floral Card

Hello friends! Ericka here, and today, I have a fun snarky card using the If Ignorance stamp along with the Lotus stamp.


I'm not sure why, but I love pairing a funny sentiment with florals. You can find more snarky stamps here! I stamped the If Ignorance sentiment in Versafine Clair ink and clear embossed it. I then stamped the Lotus twice in Hickory Smoke Distress Ink and colored them up with my colored pencils. Thank you for stopping by and I hope you have a wonderful week!

February 18, 2024

Grant Me Serenity Card

 Hello, crafty friends! Tracy here, and today, I am sharing another fabulously snarky card. Perfect for a little giggle. Here are all of the details.


Crackerbox Stamps Used:

Cut a white cardstock card base and a white cardstock card front. Stamp Lady Stella in the bottom corner of the card front using black ink. Add color to the image using Zig Clean Color Markers and a waterbrush. Next, using Distress Oxide Ink, blend around the edges of the card front. Then, stamp the star's image around the border of the card front. 
Stamp the sentiment to the card front using black ink. Adhere to the card base. Add Stickles to each of the stars and let dry completely.

Thanks so much for stopping by!

February 16, 2024

Cupid Valentine Cards

Toni here with you today, sharing a vintage inspired Cupid Valentine card with a snarky twist.


 I created a striped background using a variety of solid cardstock with a scalloped border.  It would have been very easy to simply cut strips of cardstock in a variety of colors, piece them together, and cut them to the size of the card front.  Either way, you are able to create a variety of card fronts at once to make each card unique.

I stamped and embossed the Cupid (isn't he sweet?!) in gold on vellum.  I masked and stamped the Weird Stalker sentiment as well.  I then cut out the pair out with a scalloped circle die. I used two layers of vellum to limit transparency.


On the inside of the card, I stamped the remainder of the Weird Stalker sentiment and applied a couple of strips of washi.  Cracks me up!

For a full list of products used and to see my other projects, feel free to visit my blog, FrankieHelpsCraft.  Have a great rest of your week!